Antonio and Lorena were keen to create a space in their garden to begin growing vegetables. They had ample open space to be able to build large raised beds to begin their growing journey.

Antonio & Lorena’s raised vegetable garden
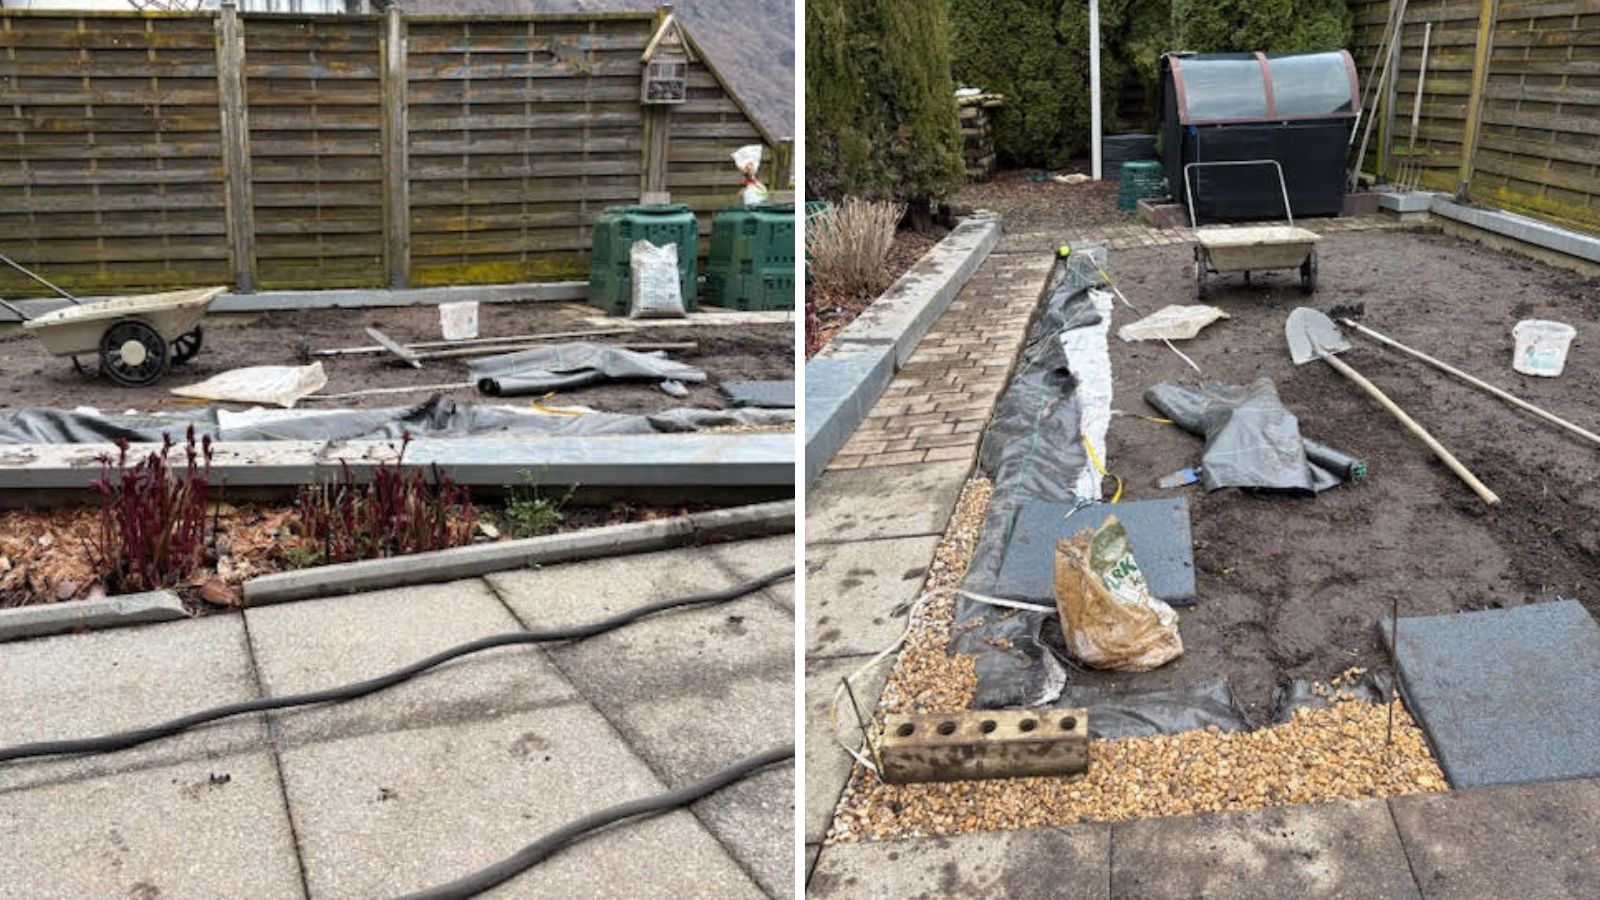
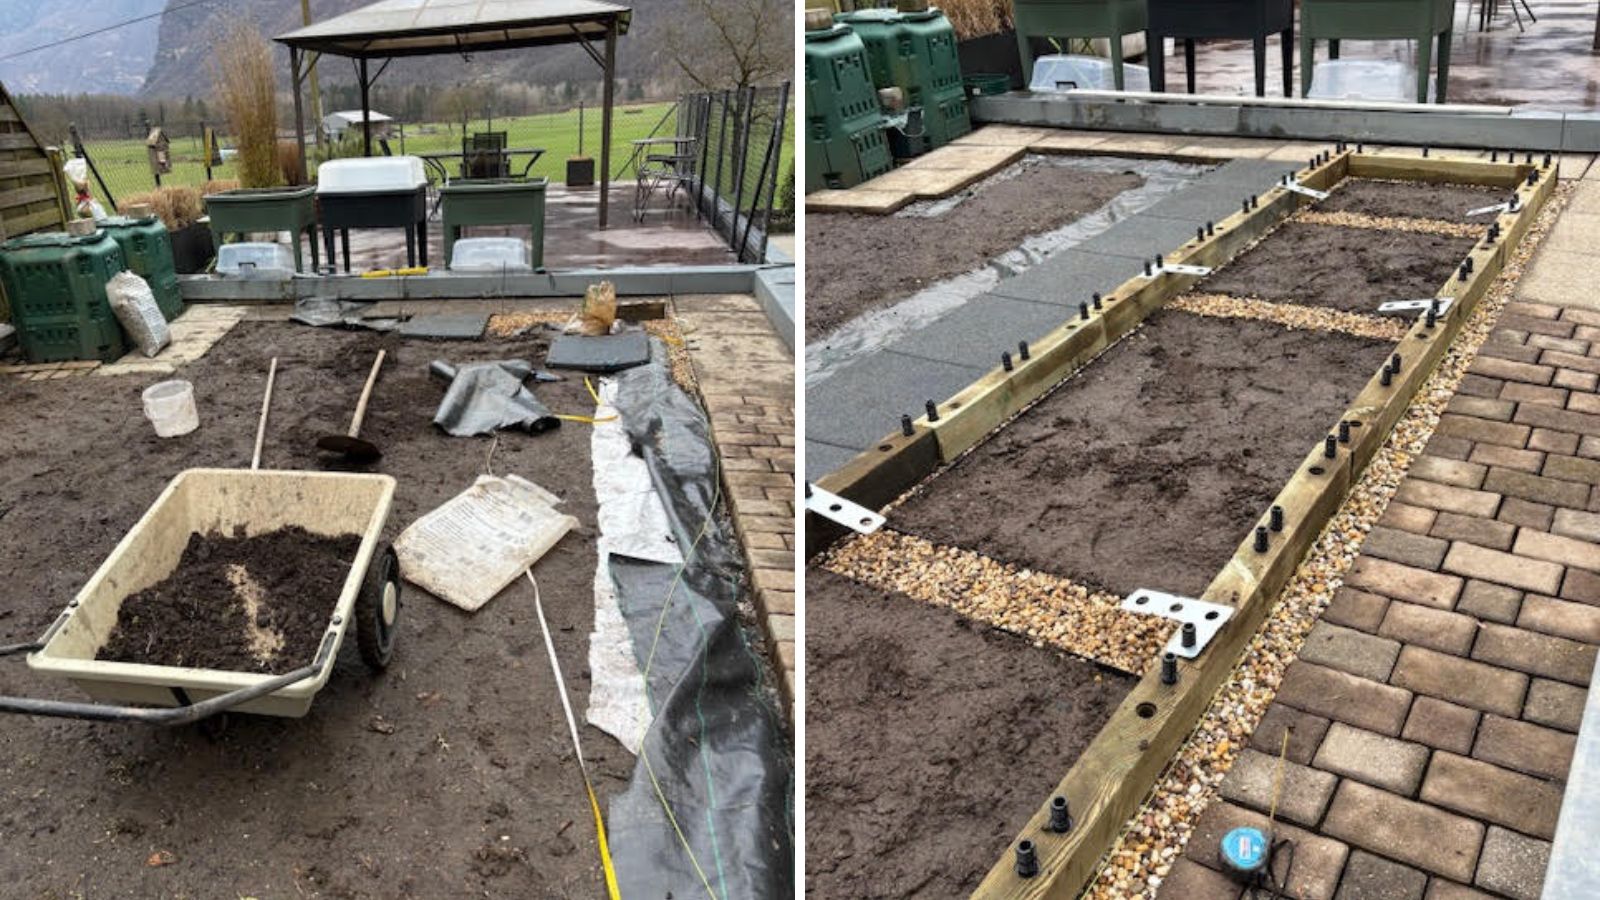
Antonio and Lorena’s garden had a relatively flat space which is the perfect blank canvas for WoodBlocX raised beds to be assembled. The space required minimal preparation before the build could begin as the ground was fairly level. It is very important to ensure the ground is completely level before beginning any WoodBlocX build.
Planning the Garden
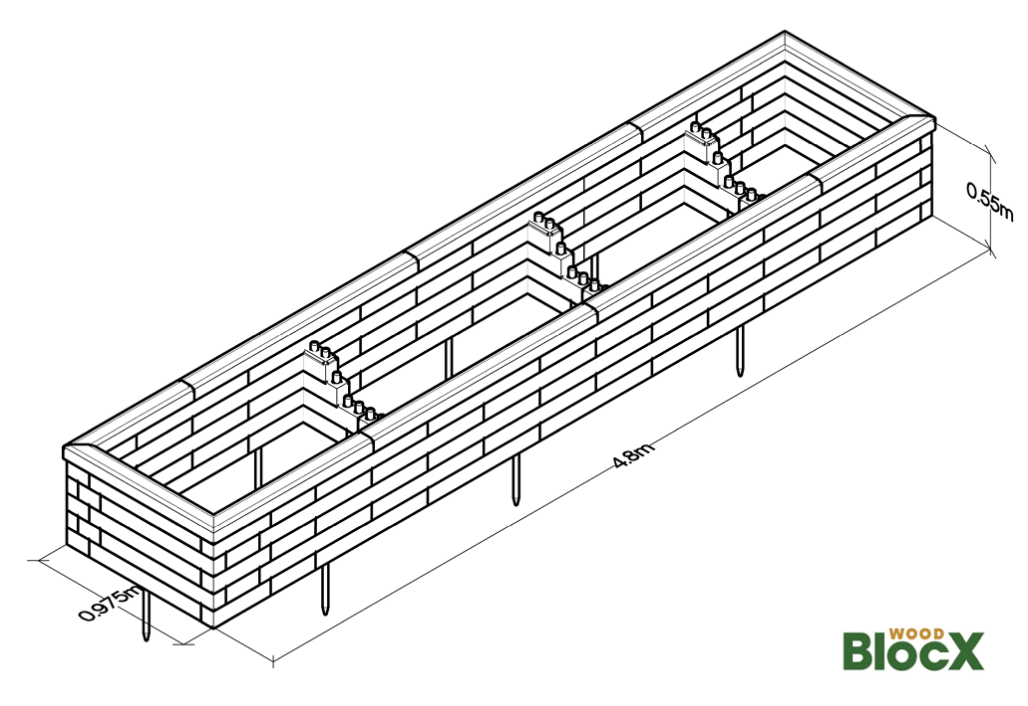
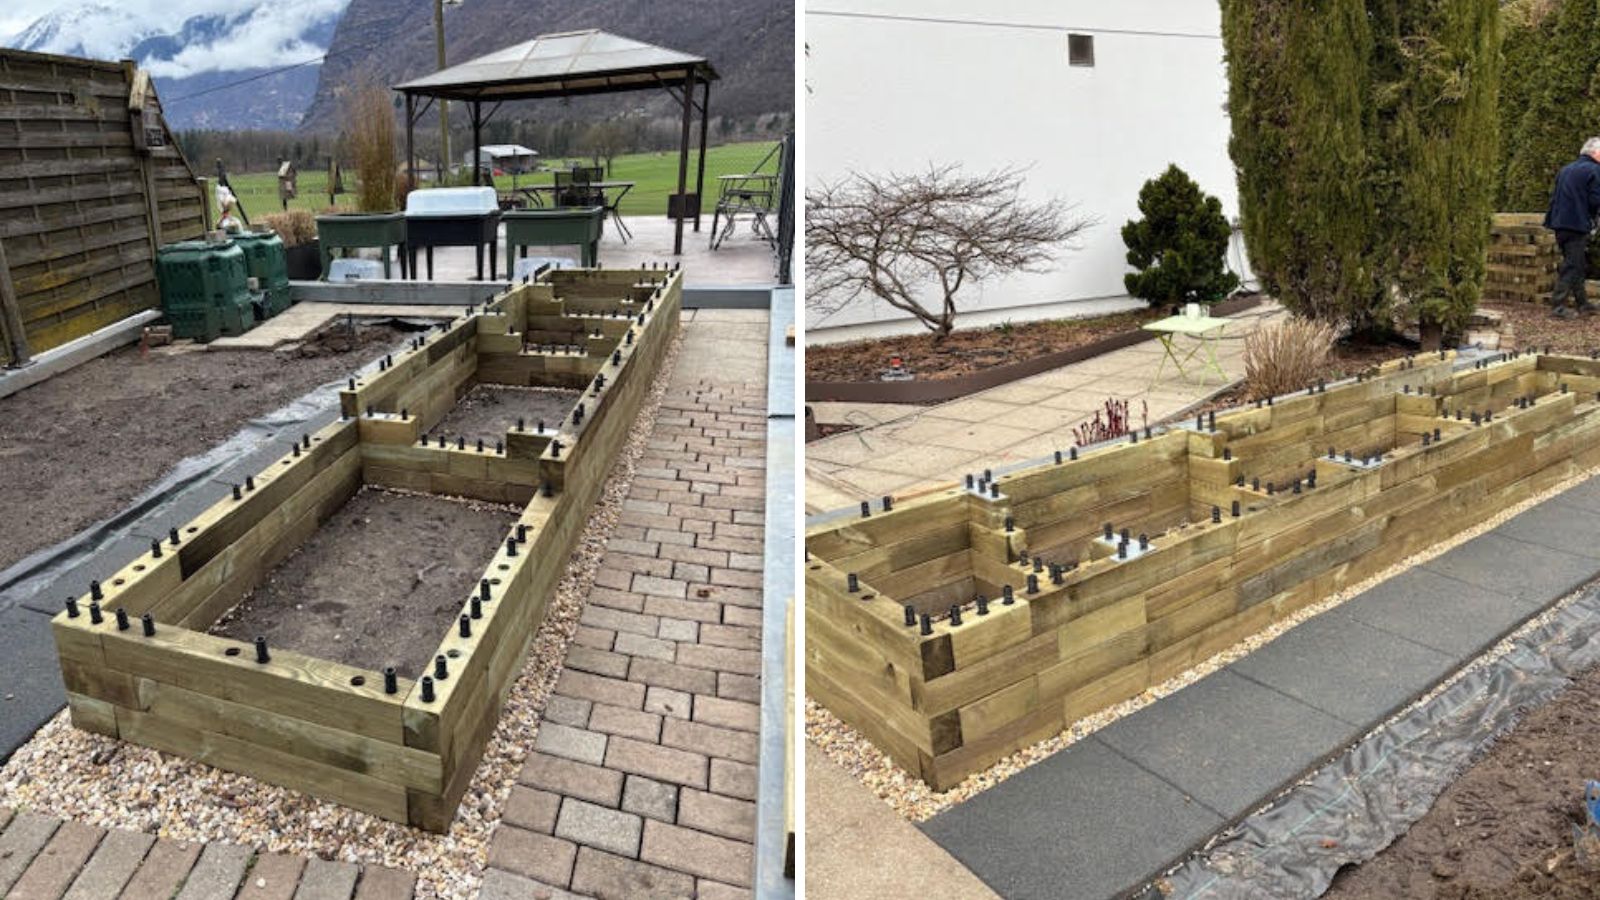
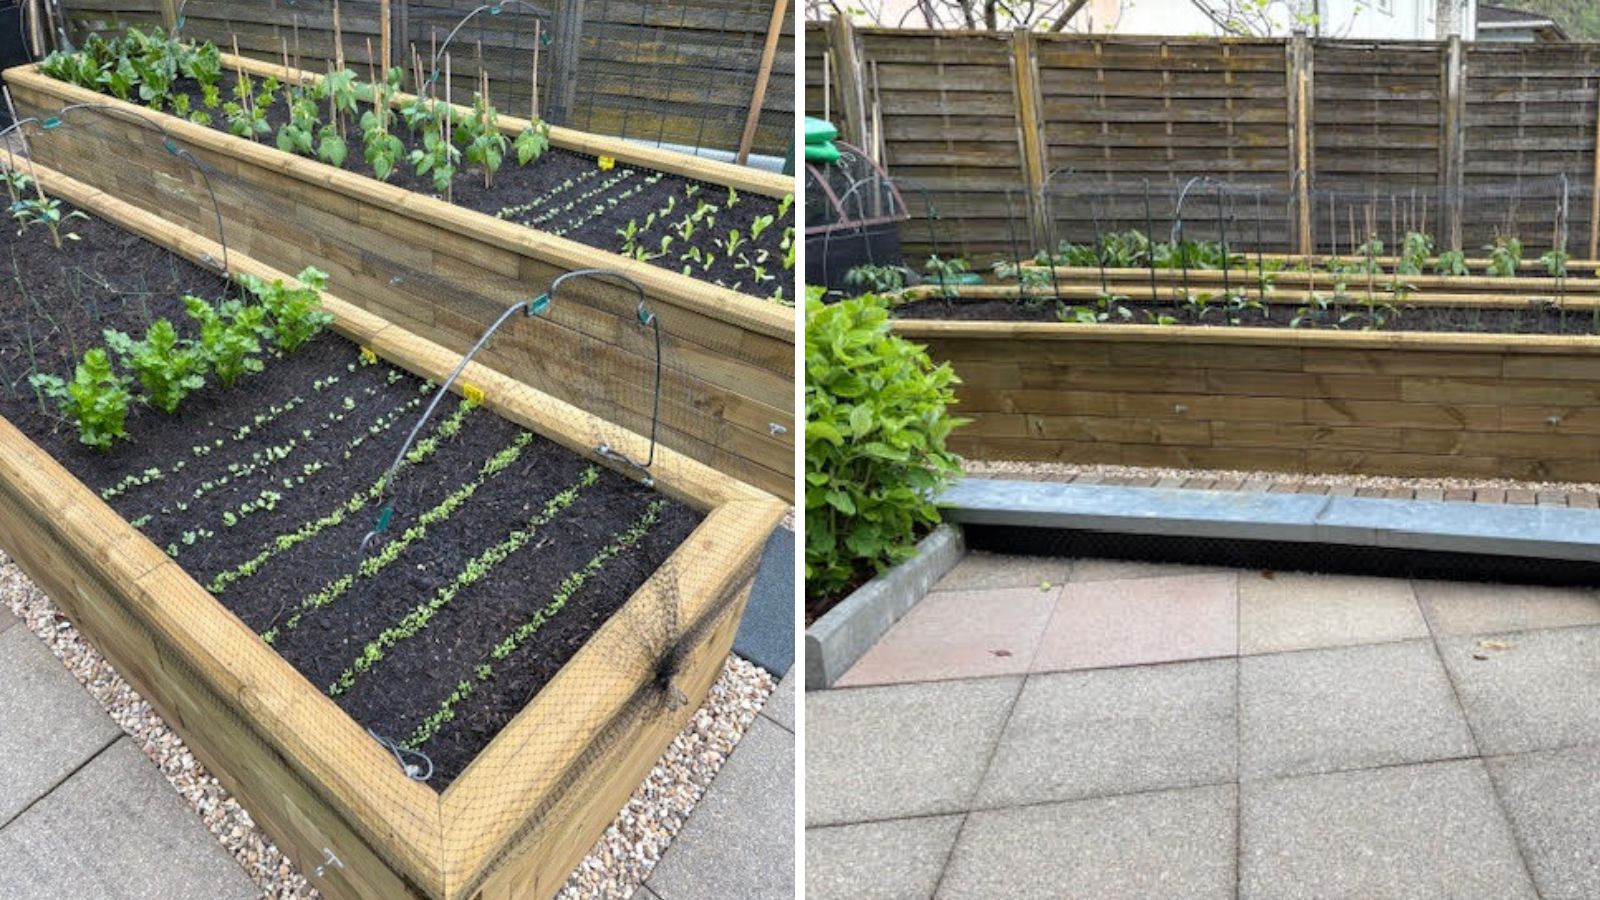
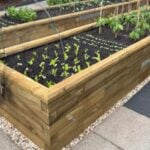
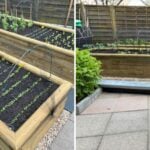
The available garden space was long so there was the opportunity to build a long raised bed. The customer used our online raised bed calculator to choose the correct dimensions to fit the space. The build space was large so the customer chose to have two identical raised beds measuring 4.8m in length by 0.975m wide by 0.55m in height.
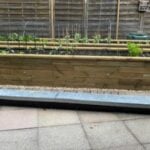
The space was surrounded by a small concrete wall and block paving to frame the area. The customer had planned to build the raised beds in the centre space, requiring some ground work to ensure the ground was level.

Preparation and building
Initial work began to prepare the space before the WoodBlocX construction began. A new path was built to run directly between the two planters and the ground was prepared in line with the supporting buttresses.
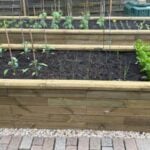
The WoodBlocX planter was ready to be built and the first layer of BlocX were laid and secured using ground spikes into the soft ground. We also offer angle floor brackets if the WoodBlocX structure was being built on a hard surface such as a patio, tarmac or concrete. Antonio and Lorena followed the step-by-step instructions to add each layer, finished off with our traditional capping. We also offer a modern capping option however, this is only available for customers through our Free Design Service.
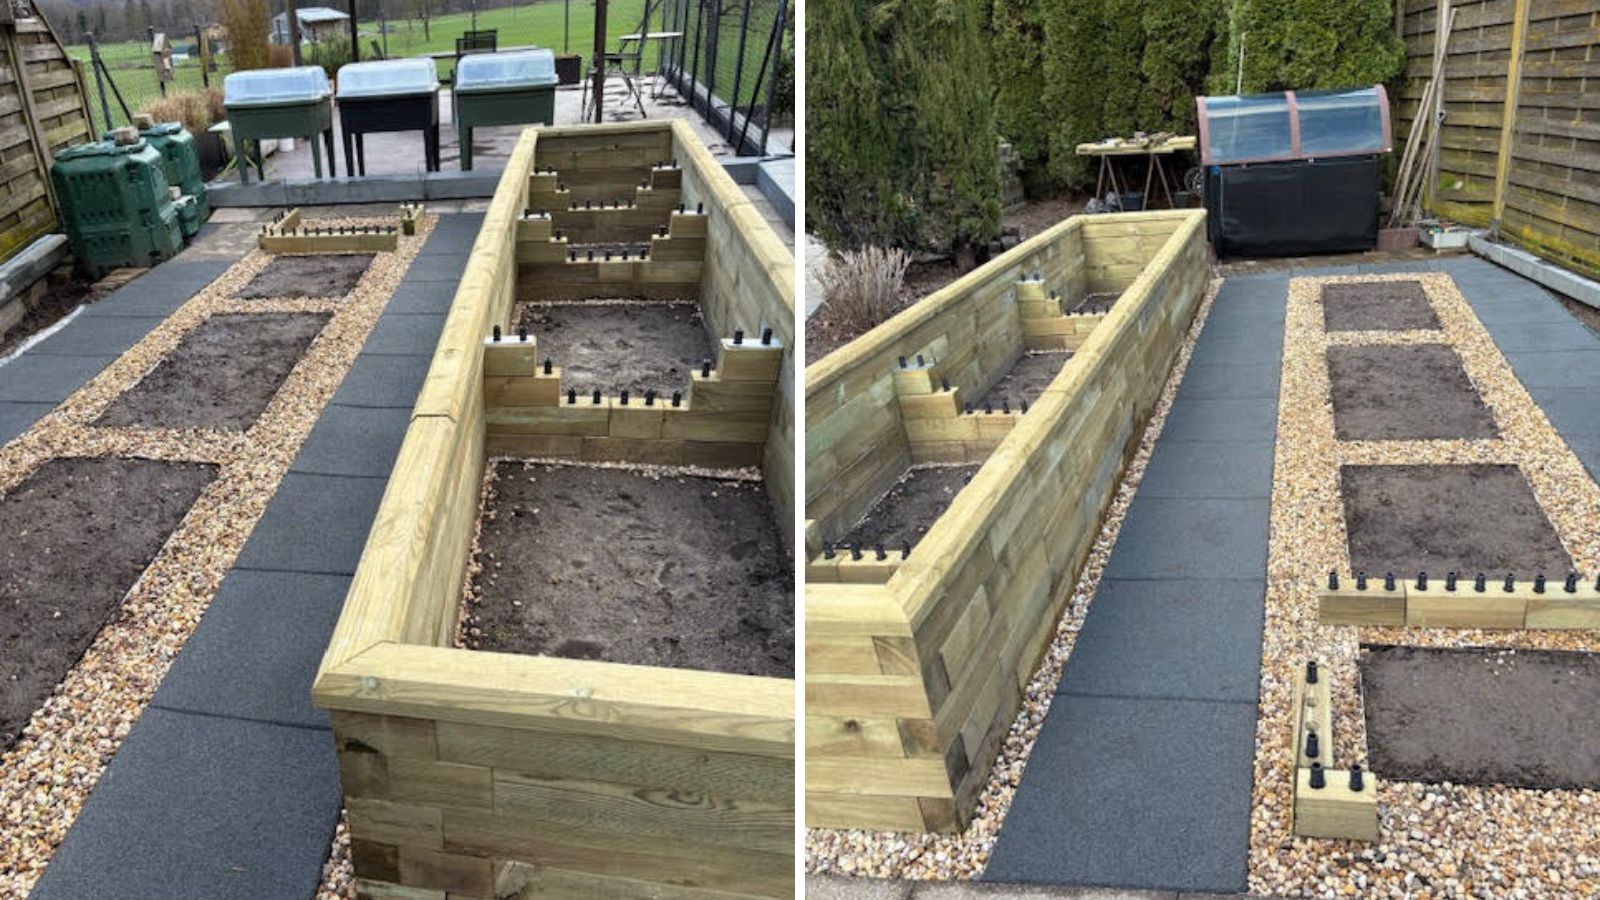
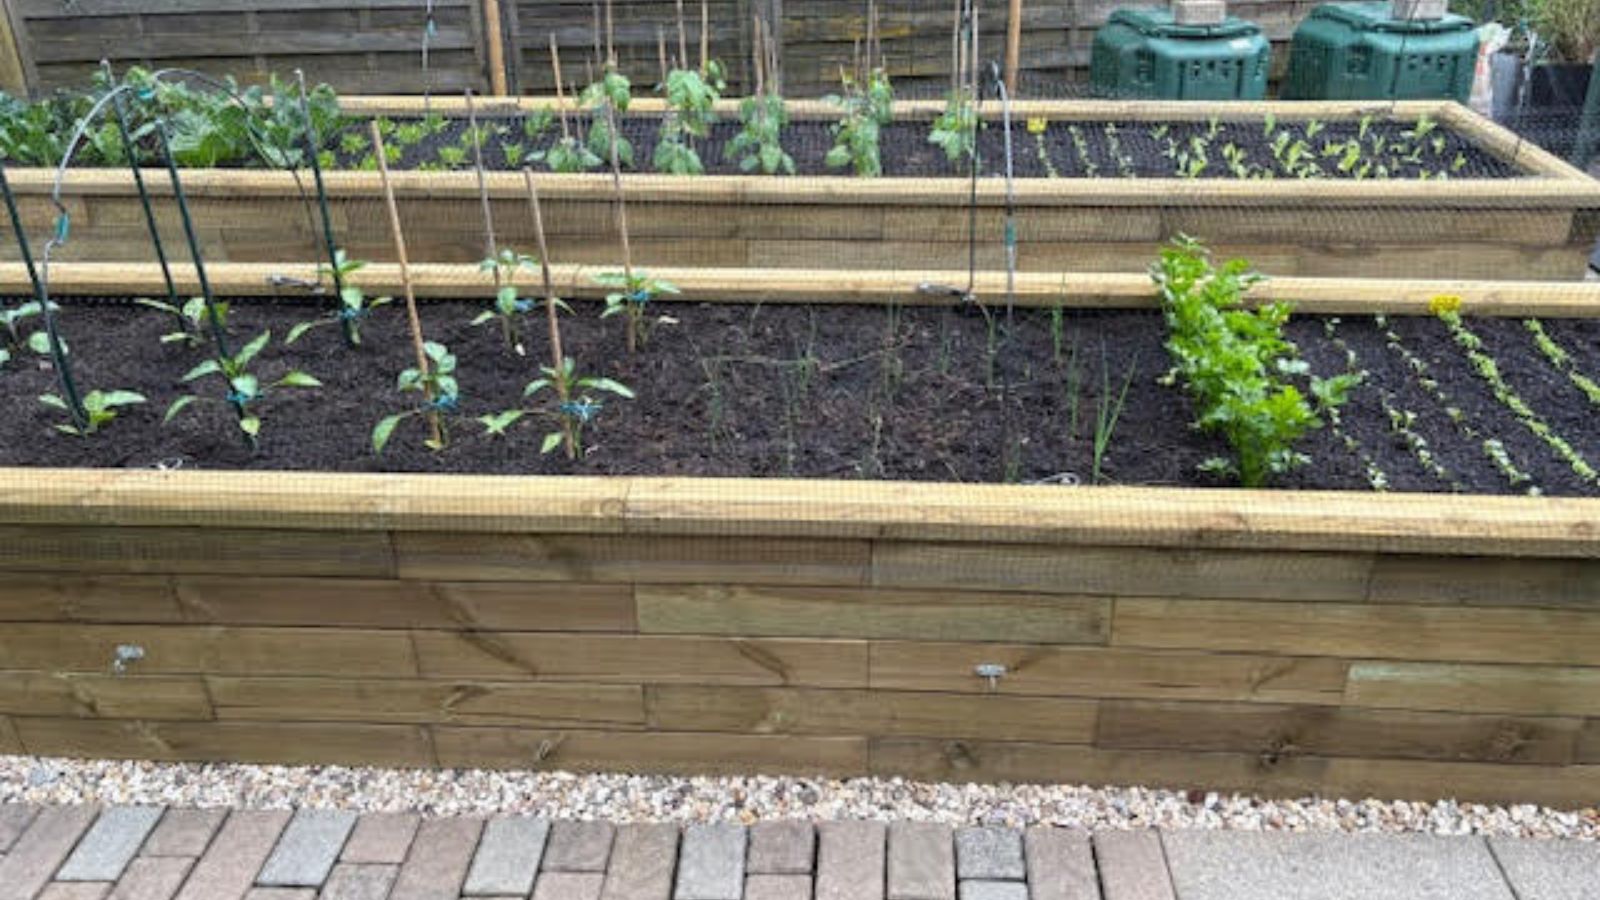
The raised beds have been lined in order to prolong the quality of the WoodBlocX. The lining has been neatly fitted around the supporting buttresses. These are used to provide additional support and to help prevent the planter from warping, maintaining a strong structure. The raised beds were filled with straw and other garden materials before the soil was added on top, ready for sowing Antonio and Lorena’s chosen vegetables. Read our blog post to find out the best way to fill your raised bed, whether it’s for planting colourful flowers or delicious fruit and vegetables.

Finished Garden
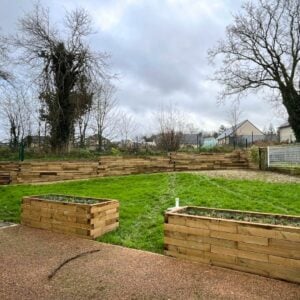
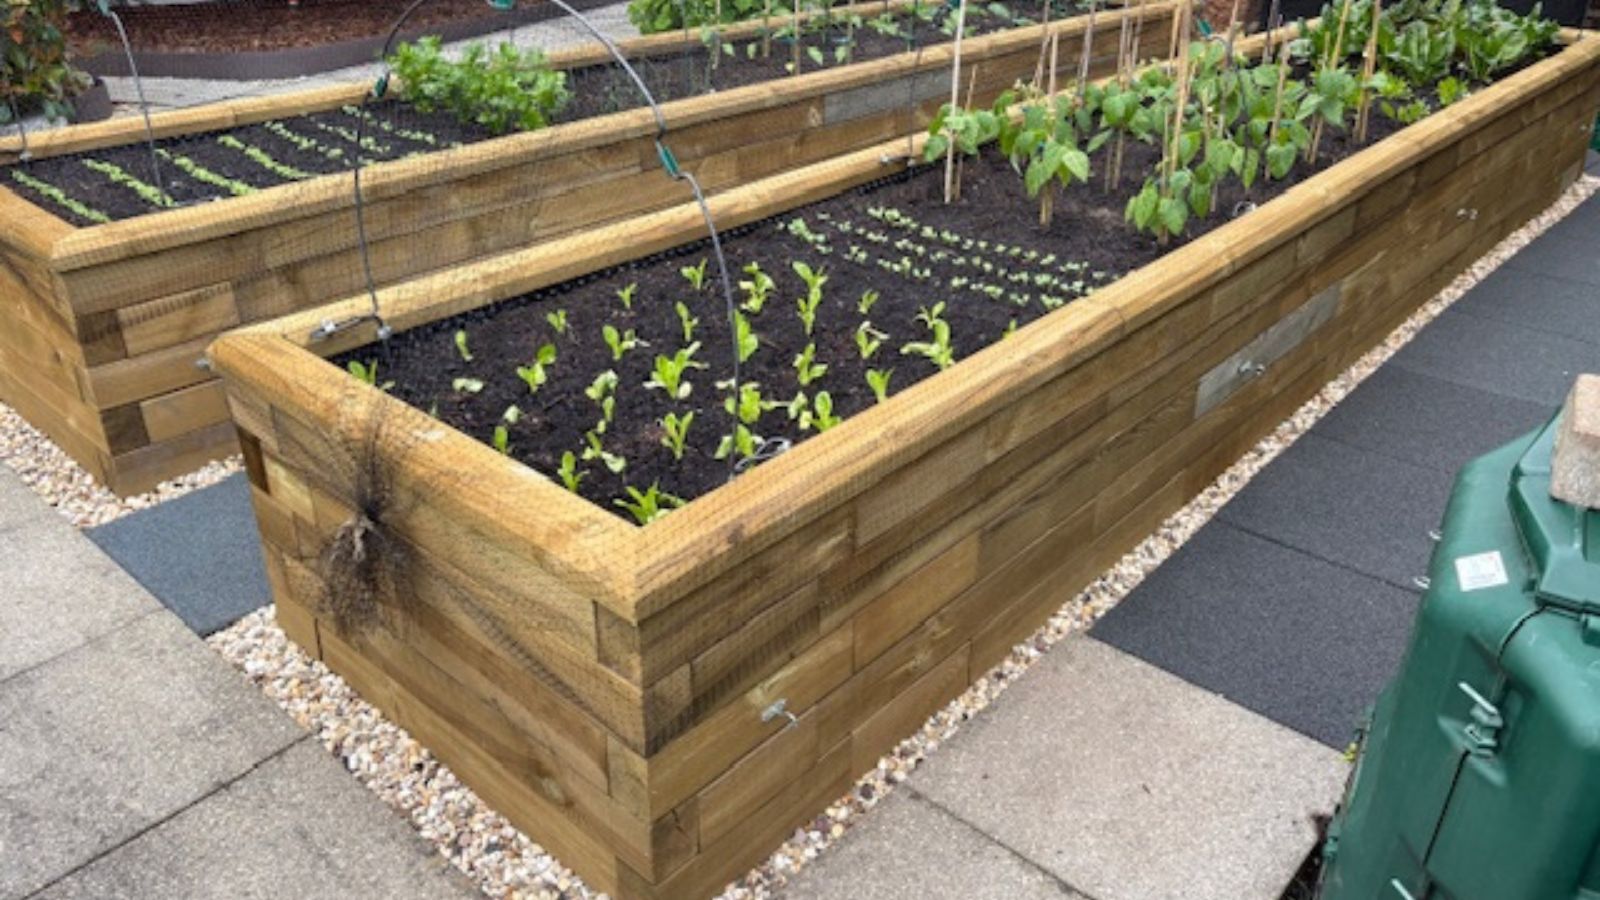
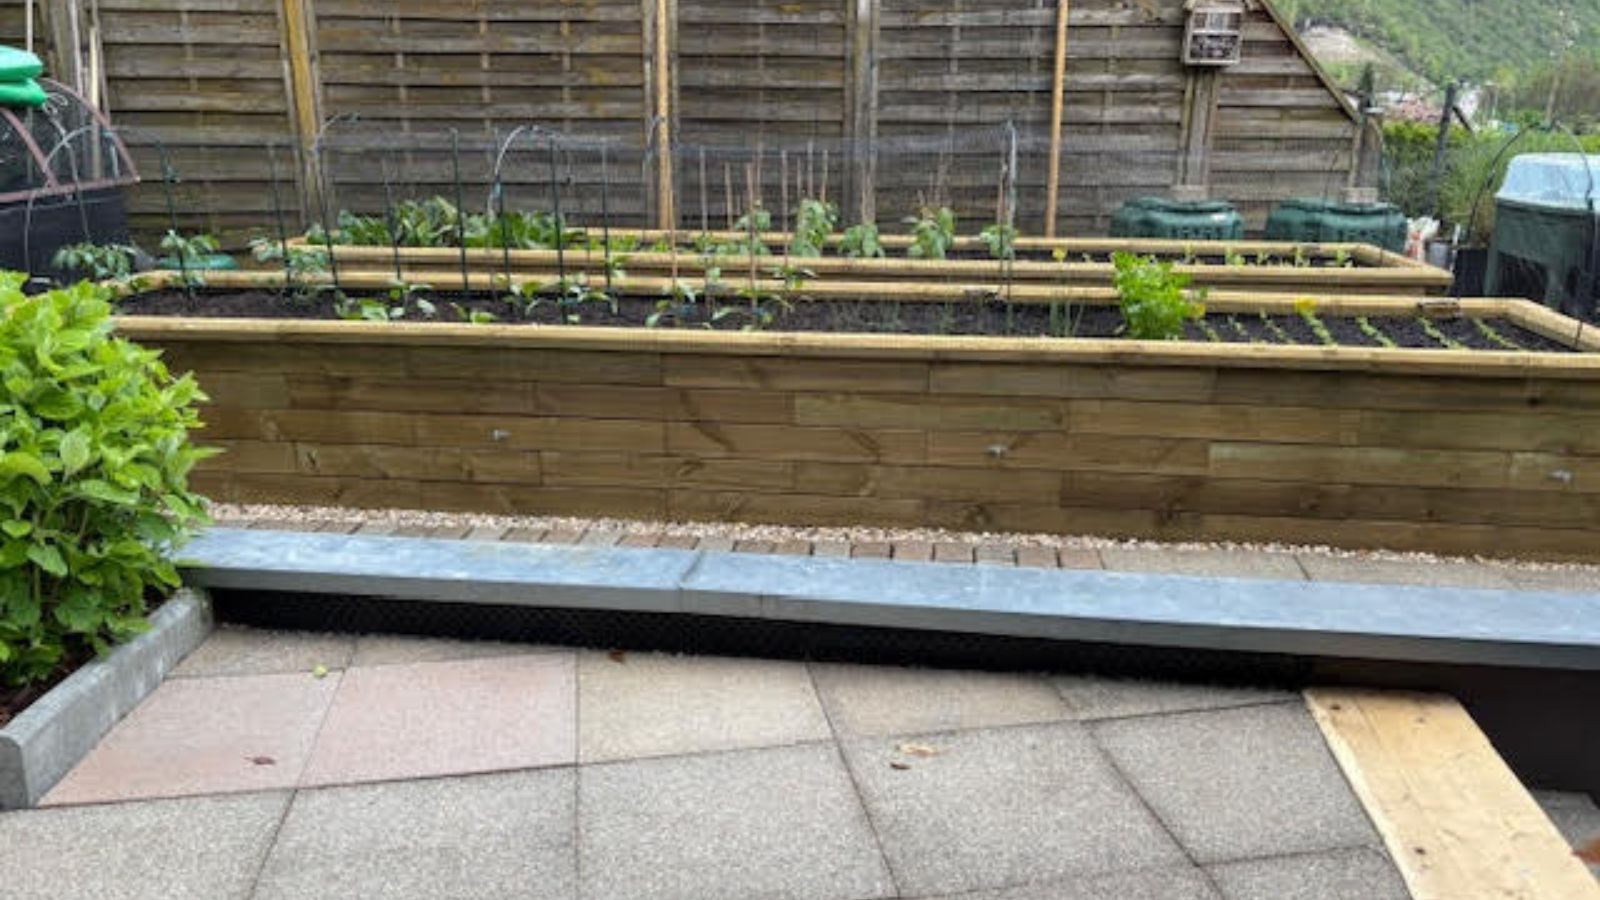
The two long rectangular planters have been built side by side to give Antonio and Lorena ample space to grow vegetables. The path between the planters gives a solid base to access each raised bed from all sides for planting, sowing, weeding and general maintenance. Decorative gravel has been added around each planter in the kitchen garden area to give it the finishing touch. Crop protection netting has also been added to provide protection to the vegetables as they grow. See our customer garden case studies page for vegetable garden inspiration!
The planters have enhanced an otherwise open space allowing Antonio and Lorena to begin their vegetable growing journey with a beautiful mountain backdrop to enjoy.
A happy WoodBlocX customer
Antonio and Lorena were delighted with their vegetable garden, here is what they said - "We are very satisfied with your product and your impeccable service.”

Create a long raised bed vegetable garden
Build your very own vegetable garden with our raised beds - tailored to your budget and space. Tall or low, long or short - use our online raised bed calculator to create your raised bed in the perfect shape and size to fit your garden.