How to line your WoodBlocX raised bed
A complete guide

We strongly recommend adding extra protection to our raised beds in the form of a liner - this will maximise the lifespan of your WoodBlocX structure. In this blog we explain how to install a liner, the benefits of doing so and the different types of liner that are available.
How To Install a Protective Liner PDF Guide
What are the benefits of lining a raised bed?
First and foremost, adding a liner to a raised bed provides an extra layer of protection for the wood against rot and dampness. At WoodBlocX, the timber that we use for our modular raised beds is pressure-treated with a protective treatment that’s made to last for 15 years, however, it’s very important to install a liner where soil comes into contact with timber.
By adding a raised bed liner, you are providing an extra layer of protection to prevent the wood from decaying overtime (something which is very common with cheaper raised bed alternatives). Raised beds can be susceptible to rotting due to moisture collecting behind the walls from watering and rainfall. If you are using manure in your raised bed, this will speed up the decaying process so it’s even more important to install a protective liner!
Whatever you plan to grow in a WoodBlocX raised bed, we strongly recommend lining it for extra protection and to ensure it lasts as long as possible. For ideas and inspiration on what to grow in your raised bed check out this helpful blog.

Choosing a liner for raised beds
There are two key types of interior liner for raised beds. We sell a DPM plastic liner but others are available.
Plastic (non-porous liners / damp-proof membranes)
High-quality plastic damp proof membranes offer the best type of protection for your raised bed. This type of liner will ensure your structure stays in great condition. WoodBlocX raised beds are built to last for 15 years when lined but can last much longer if they are well looked after.
We highly recommend installing a DPM liner… ours is made from recycled plastic! Bubble wrap can also be used as a liner option, so if you have large amounts left over from moving house you could utilise it as a liner.
Fabric or natural liners
These breathable raised bed liners can be made from fabric or coconut fibre and provide excellent drainage within raised beds, however they will not protect the wood against rot as they will quickly become damp and begin to break down.
For gardeners who prefer natural materials, using this type of liner is still an option, however it is recommended to replace the liner after every growing season.


Ground types and drainage
For WoodBlocX raised beds built on open soil or grass (soft ground), you should add liner to the side walls including buttresses and leave the base of the raised bed open to allow for good drainage. If the soil or grass you are building on is damp, we advise our customers to build the raised bed on a breathable plastic liner to add that extra bit of protection underneath the structure.
To reduce the volume of soil needed, you could add a drainage layer such as hardcore, sand, logs, twigs or stones - this also helps to prevent weeds from growing up from the ground.

For WoodBlocX raised beds built on patios, paving, concrete or tarmac (hard ground) we recommend fully lining the raised bed including across the base and buttresses. This lining method creates the space to hold soil and adding a few pin holes at the bottom can help with drainage if the soil becomes waterlogged.
When building on hard ground, we recommend adding a drainage layer before adding soil, this could be made up of pea-gravel, sand, rubble or small stones (you really can use whatever you have around in your garden!).
How to line your WoodBlocX raised bed - step by step
#1 Building your structure
Build your WoodBlocX raised bed up following the step-by-step instructions provided with your order. Once you get to the final layer of BlocX, before the capping is added, this is the point when you need to install your liner.
Before cutting the liner, lay it over the sides and buttresses of the structure to determine how much you need and whether it needs to be cut to size. When buying raised bed liner, we always recommend buying more than you need so you have plenty of excess to work with.


#2 Adding the liner
Once you have a good idea of the length(s) of liner needed you can begin to fix it in place, this is done by holding the liner in place over the dowel holes and knocking the dowels in, this ensures the liner is fixed in the right position and will stay strong and secure overtime.
If you have already put the dowels in for your top capping layer, you can remove them using your dowel removal tool and hammer them back through your liner. Otherwise add the liner by making small incisions with a hand knife, and place it over each of the dowels before adding your capping layer.
Make sure you leave a couple of inches of liner hanging over the outer edge, this can be cut and neatened up once you have the liner in place.
Once the liner is fixed in place, spread it out inside the structure making sure it is covering the buttresses.
If you have already added your capping, don’t panic… you can add the liner by stapling, nailing or screwing it into the inside of the wood.


#3 Add the top capping layer
Once you are happy with the positioning of the liner, trim any excess or overhanging liner, hammer on the capping layer and fill with soil!


Download and print our Protective Liner Guide
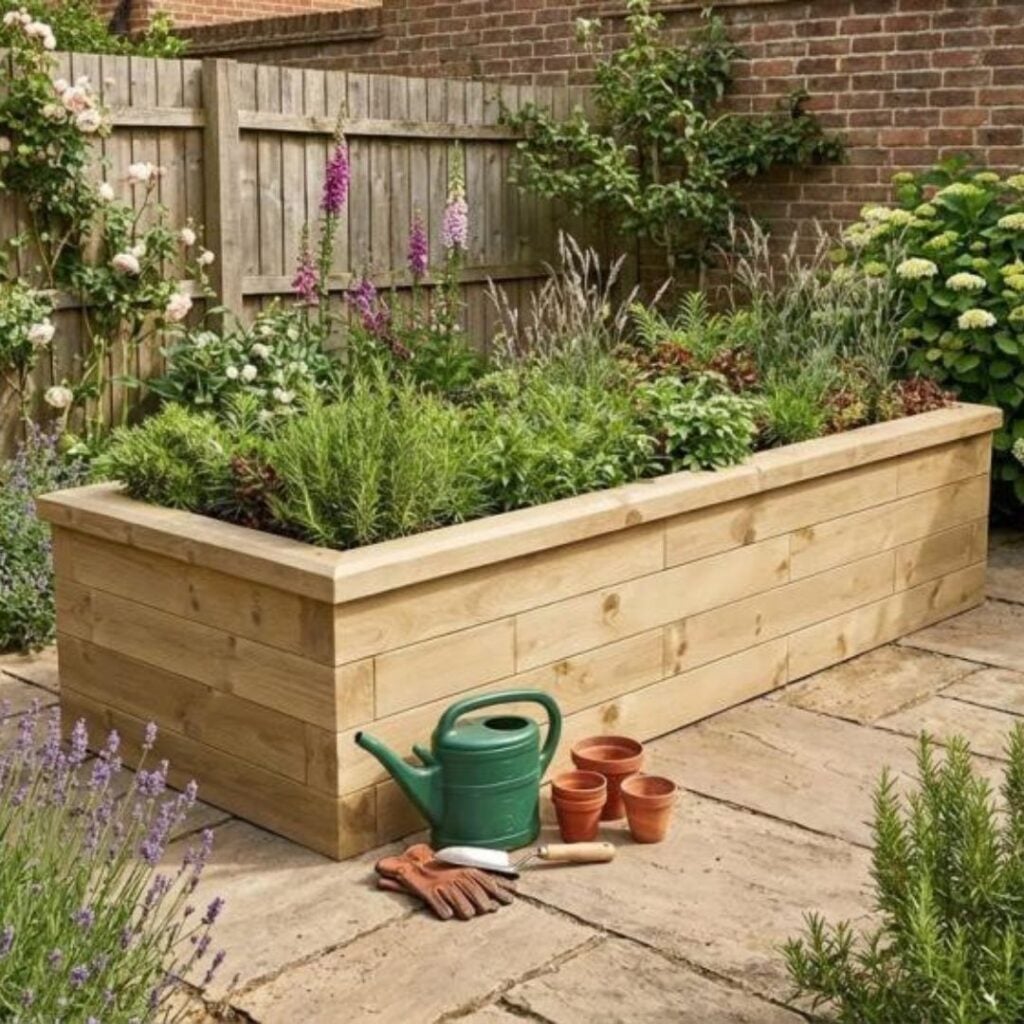
Now you're good to grow!
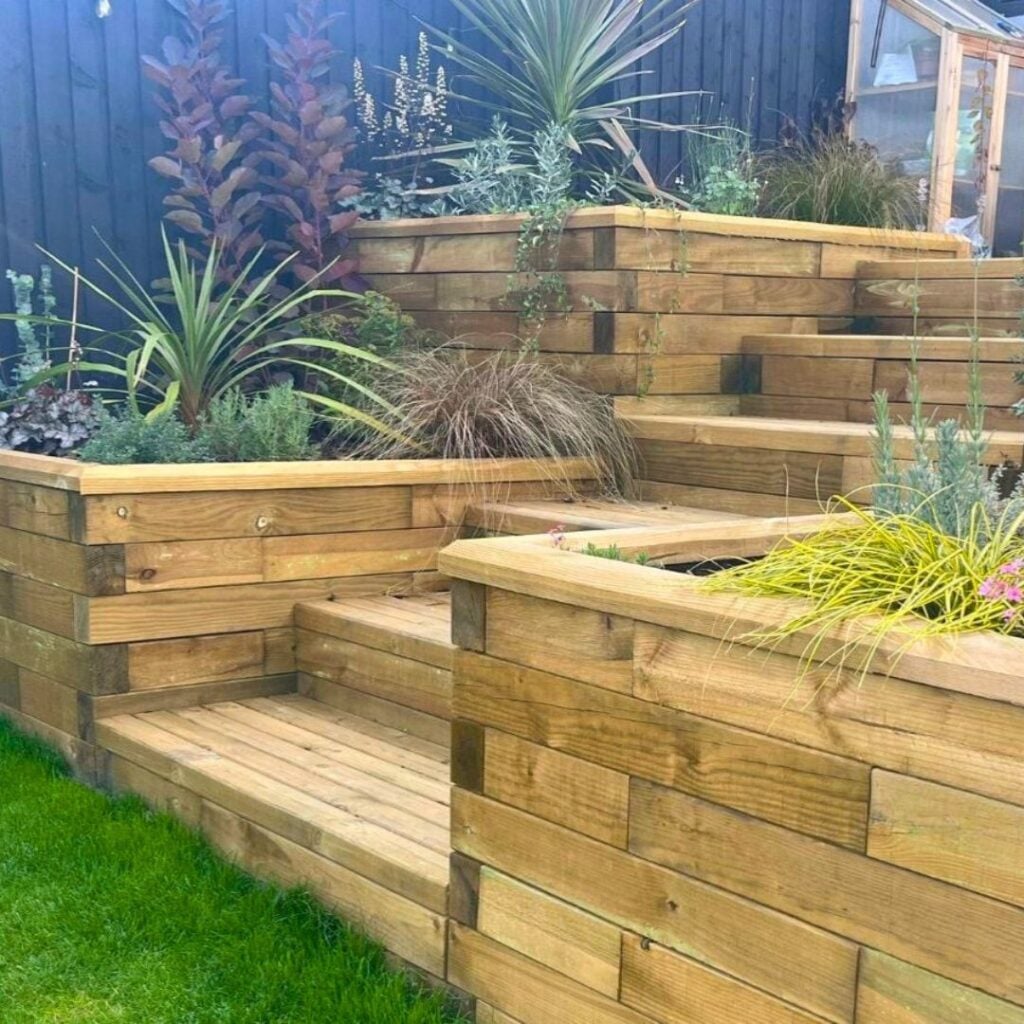
Now that your raised bed is fully lined; you're all set to start your growing journey. Whether that's edibles or ornamentals, you're guaranteed a long life span of growing in a WoodBlocX raised bed.

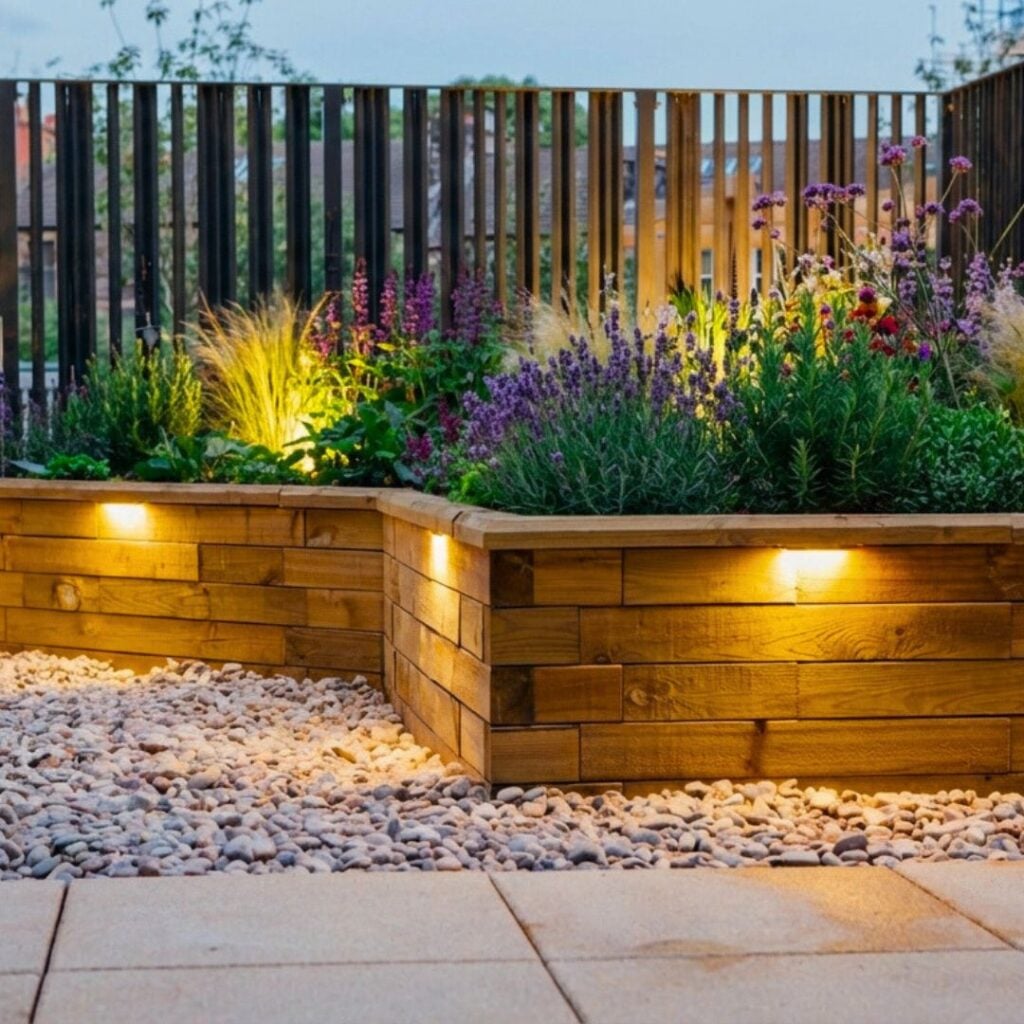
Get growing with a long-lasting WoodBlocX raised bed
Our raised beds are designed to be quick and easy to build, strong and most of all durable to give you many years of growing joy!
Our raised beds can be created in a number of shapes including rectangles, squares, circles, L-shapes and even octagons. You can get an instant price using our raised bed website calculator. If you require something totally bespoke, use our Free Design Service.
The design possibilities with WoodBlocX are endless!