How to build a WoodBlocX raised bed
Our raised beds are really easy to build because everything you need is included in your kit. All of the wooden components are cut to size so there’s no need to saw the wood and there’s no waste.
The components are lightweight making them easy to move them from one side of the garden to other and this also makes building the structures much more relaxed.
All of our kits are built in the same way so if you’ve ordered a raised bed, seat, pond or retaining wall kit this method applies to all.
")
Your delivery will look similar to this. Everything you need here, wooden blocks, capping, dowels, angle plates and step by step instructions. All wooden parts are cut exactly to the sizes requested so there’s no waste at the end of the build.
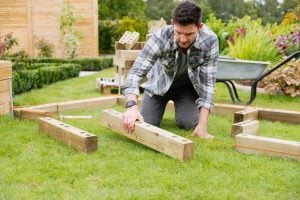
Once you have decided where your raised bed will sit in the garden carefully set out the bottom layer and make any adjustments to where you’re going to build it if needed. Refer to the instructions to check where the supportive buttresses and angle plates need to be positioned.
")
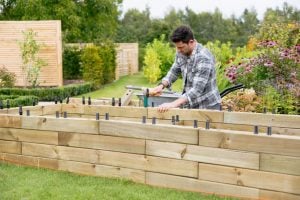
Our clever dowel system holds the structure together, simply knock these into the recess holes, make sure you refer to your instructions to ensure you’re putting them in the correct places.
When you’ve completed the first and second layers you will be on a roll. Work your way up the layers matching the first to the third, the second to the fourth and repeat.
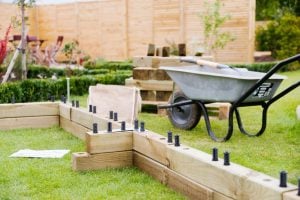
Angle plates need to be placed on the supportive buttressed for extra strength and on the corners of the final layer before you add the capping.
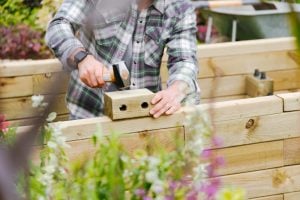
Once you’ve reached the final layer before the capping is added, cut dowels half way down using dowel cutters or a saw and fit the capping using a protective piece of wood to ensure you don't damage your caps.