How to build a raised bed using WoodBlocX
Follow this step by step guide to build your raised bed with ease
WoodBlocX raised beds are a naturally beautiful addition to any garden. Quick, fun and easy to build without power tools or any cutting required, each raised bed kit includes detailed layer by layer building instructions which are attached to your order emails. Building a stylish and durable raised bed has never been easier!
The wooden components used to build our DIY raised beds are all pre-cut so there’s no need to saw the wood and there’s no waste, making building quick and straightforward – it’s a garden project the whole family can get involved with! All WoodBlocX kits are built in the same way, using our unique dowel and block system that makes everything super strong. From raised beds to raised ponds, garden walls to garden seating, you really can build your ideal garden with WoodBlocX. So, let’s get started!
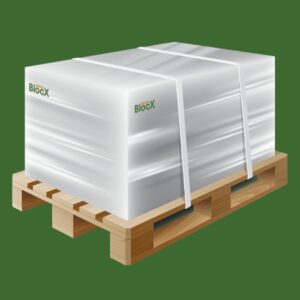
Everything you need to build your raised bed will arrive on a pallet
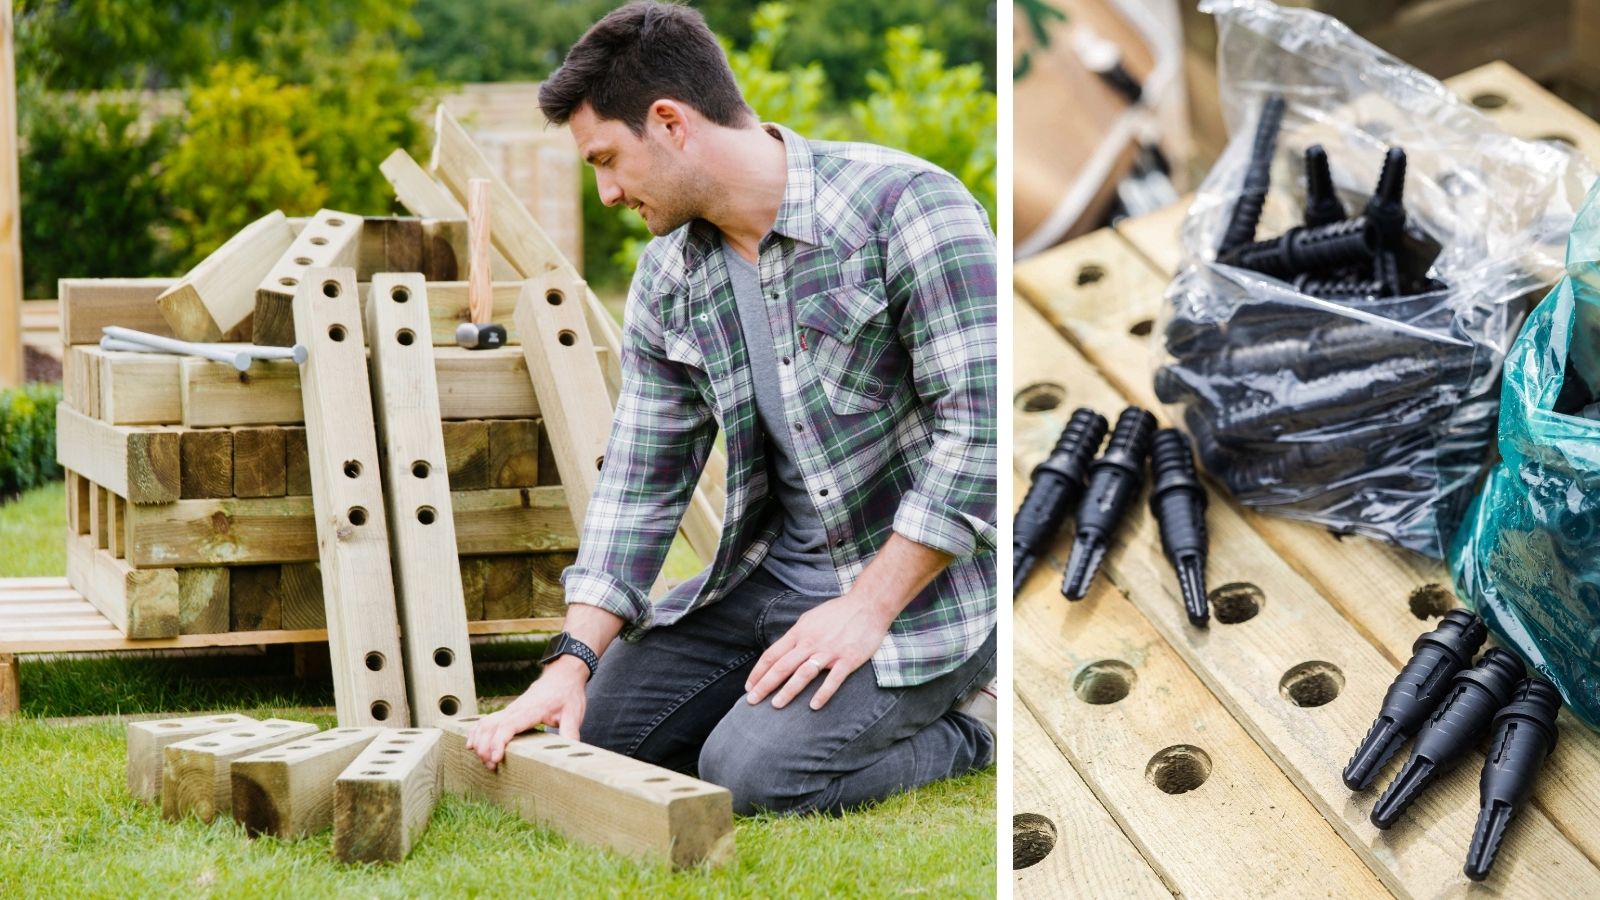
Everything you need to build your WoodBlocX raised bed will arrive on a pallet. The blocks are pressure-treated and cut to size. Dowels are made from recycled plastic with those in green bags used for the final layer – these are shorter than the rest of the dowels in your kit. All you need is a lump hammer to build your kit and we offer printed instructions for a small extra fee. For over 15 years, WoodBlocX has been used to transform gardens across the country. Our clever building system lets you create your ideal garden!
The durability and strength of our raised bed kits is what makes WoodBlocX stand out against alternative products. The pressure-treated blocks are 7.5cm thick but still lightweight enough to carry. Each WoodBlocX layer is 10cm in height with internal supports being hidden when the structure is filled.
#1 Preparing the ground where your raised bed is going to be built
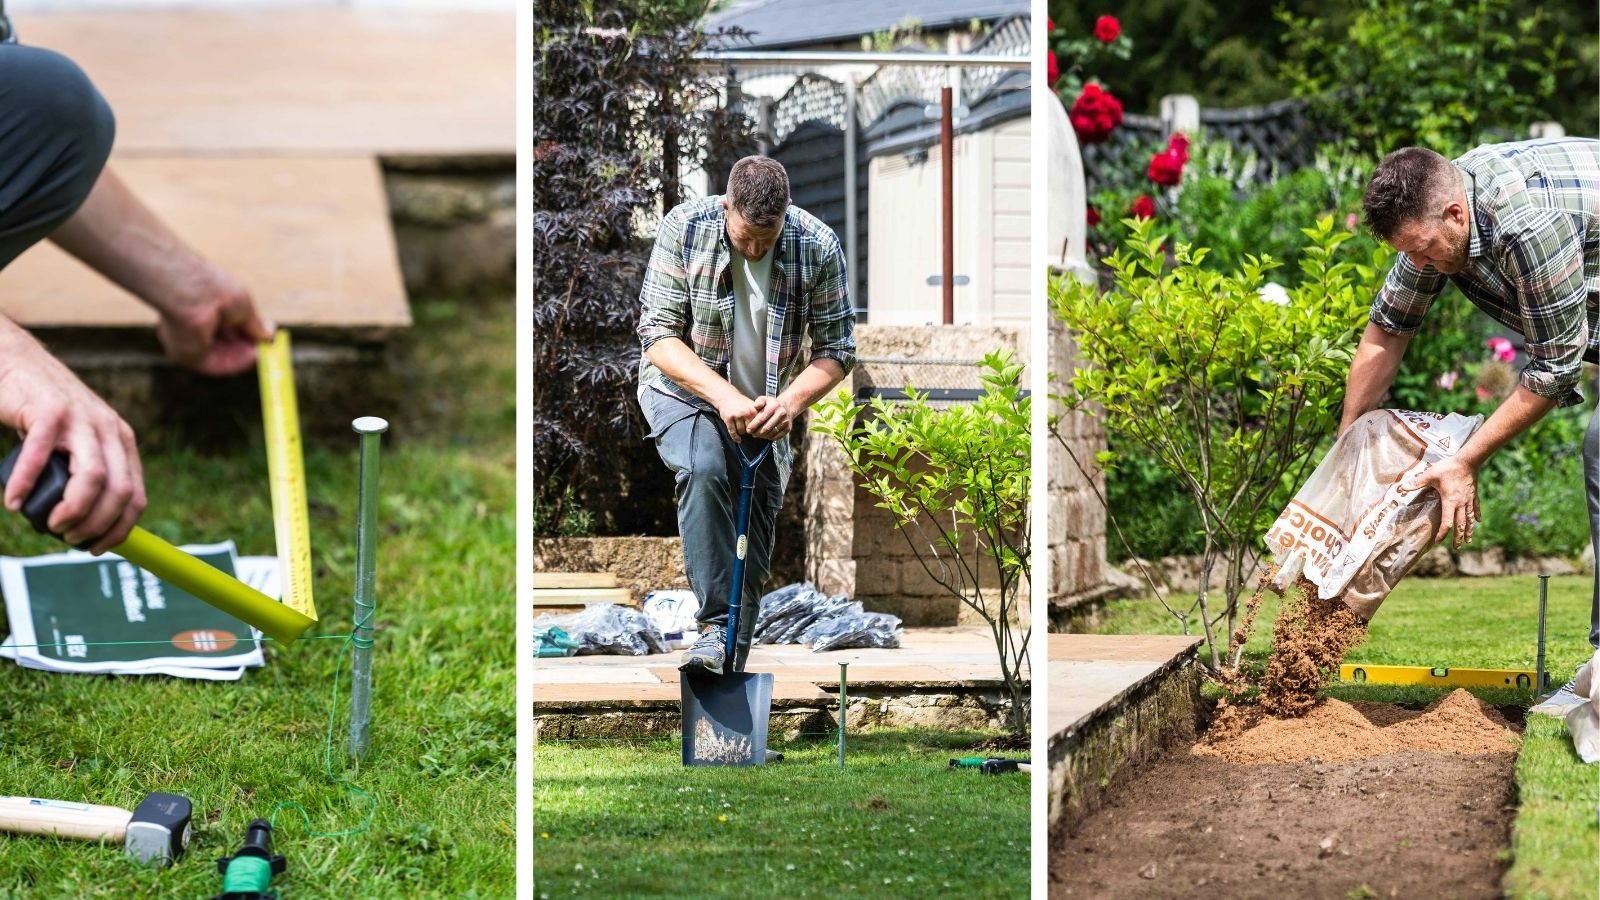
Start by marking out the area where your raised bed is going to be built. It’s vital to check this ground is suitably level as building on uneven ground can cause alignment issues later in the project. This is very important when building WoodBlocX on both soft and hard ground types.
Even if your garden appears flat, check carefully for slopes in the grass. For the project photos shown on this page, the lawn near the patio sloped slightly so the turf was cut and lifted.
Taking your time to create a level foundation for your WoodBlocX raised bed is always worth the effort! Setting you up for a successful build, it will ensure your first layer of blocks are level and subsequent rows and components will fit together smoothly.
A few bags of builders sand can be used to level the area – especially if you have removed the turf where your raised bed is going to be built. Using a block with a spirit level on top, can help to guarantee your ground is level in the right places before building begins. We offer a handy building tools kit which you can add to your order.
#2 Laying out your first row and pre-dowelling
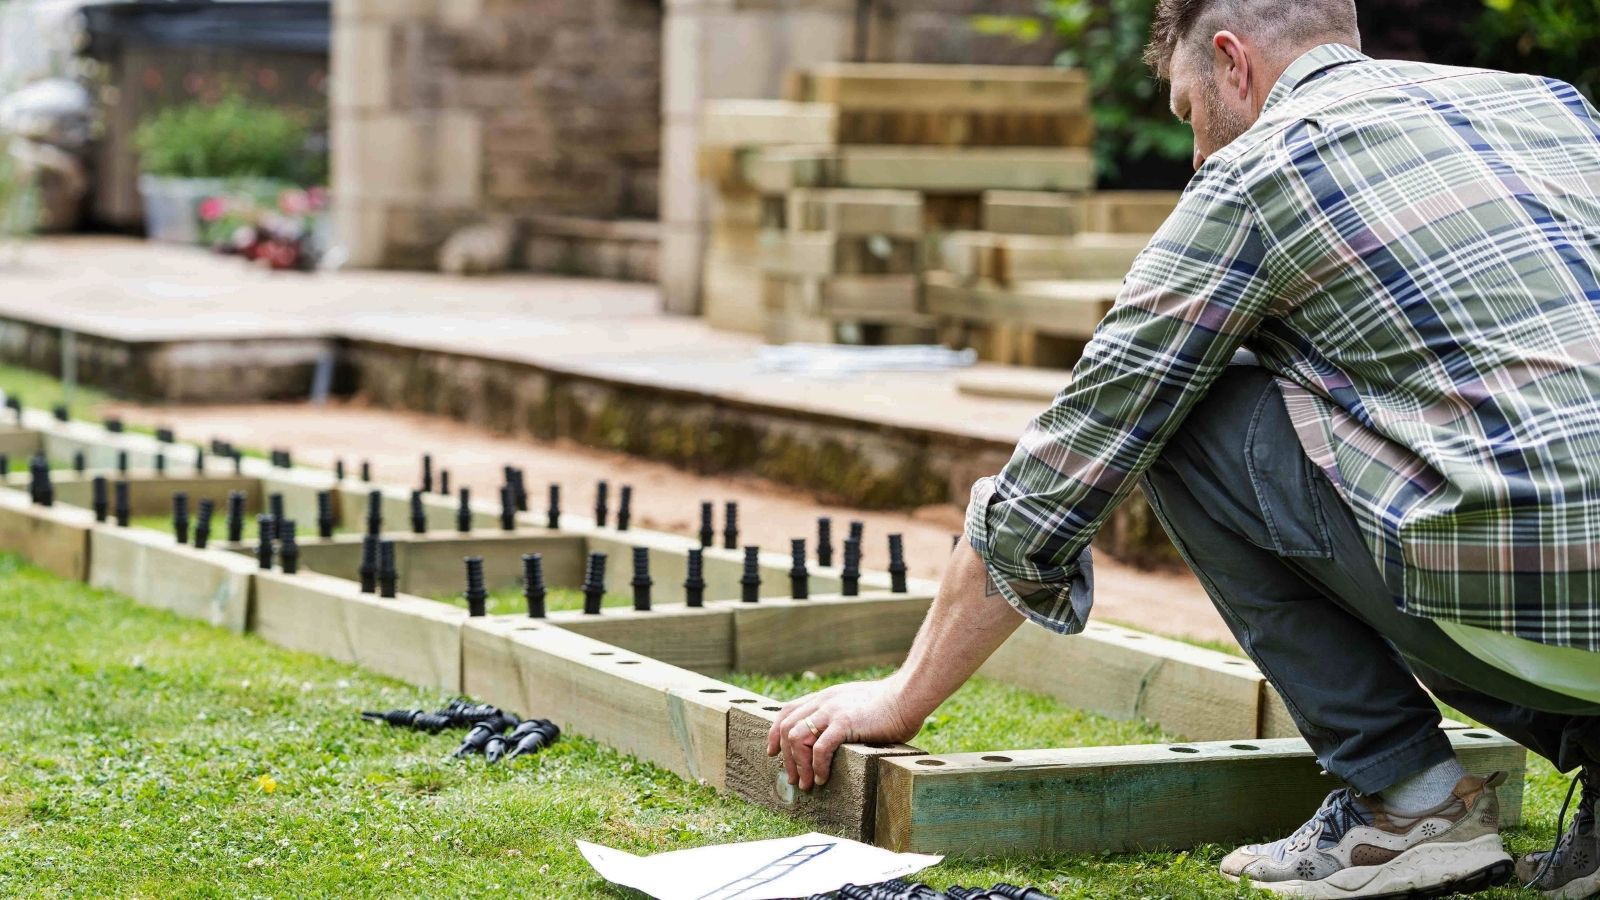
With your ground prepared, you can start building!
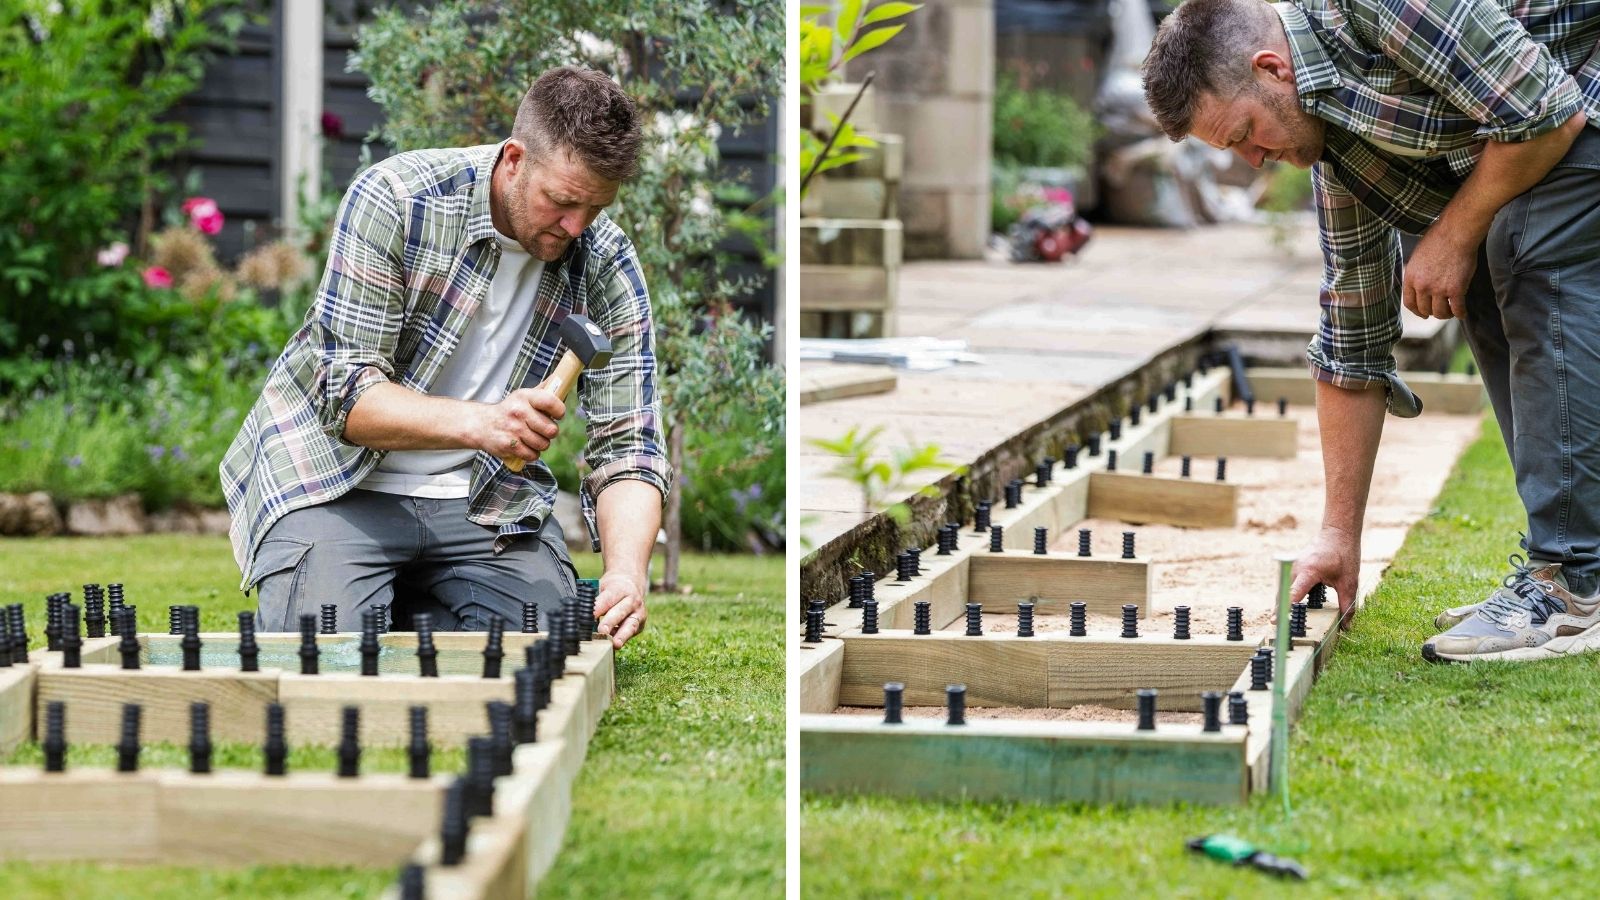
When building on soft ground, we recommend laying out your first row of WoodBlocX away from your prepared ground so you don’t disturb your level foundations when hammering in the dowels. Following your instructions for placement, hammer down the first row of dowels into the ‘recessed’ hole using your green dowel protector.
 After pre-dowelling, it’s time to carefully move your first WoodBlocX layer into position on your levelled ground – following this method should ensure you do not cause any unwanted ground movement.
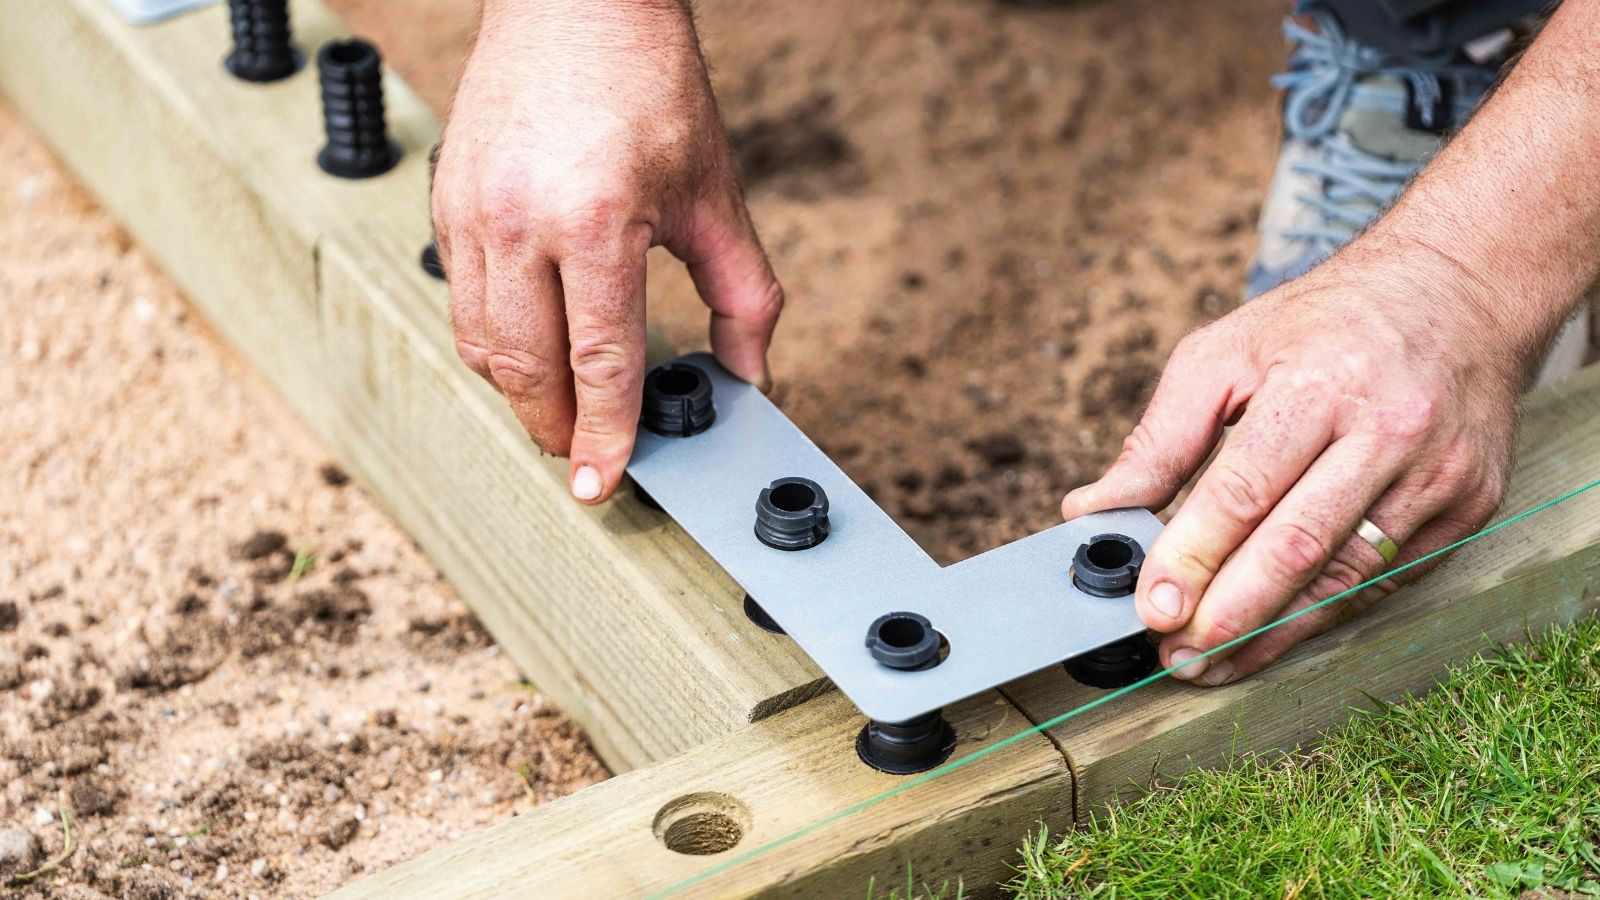 If your WoodBlocX design includes internal supports, at this point you’ll need to install your angle corner plates to tie these supports to the main structure. These L-shaped metal plates hook over the dowels and help to keep your raised bed solid and aligned.
#3 Installing your soft or hard ground fixings
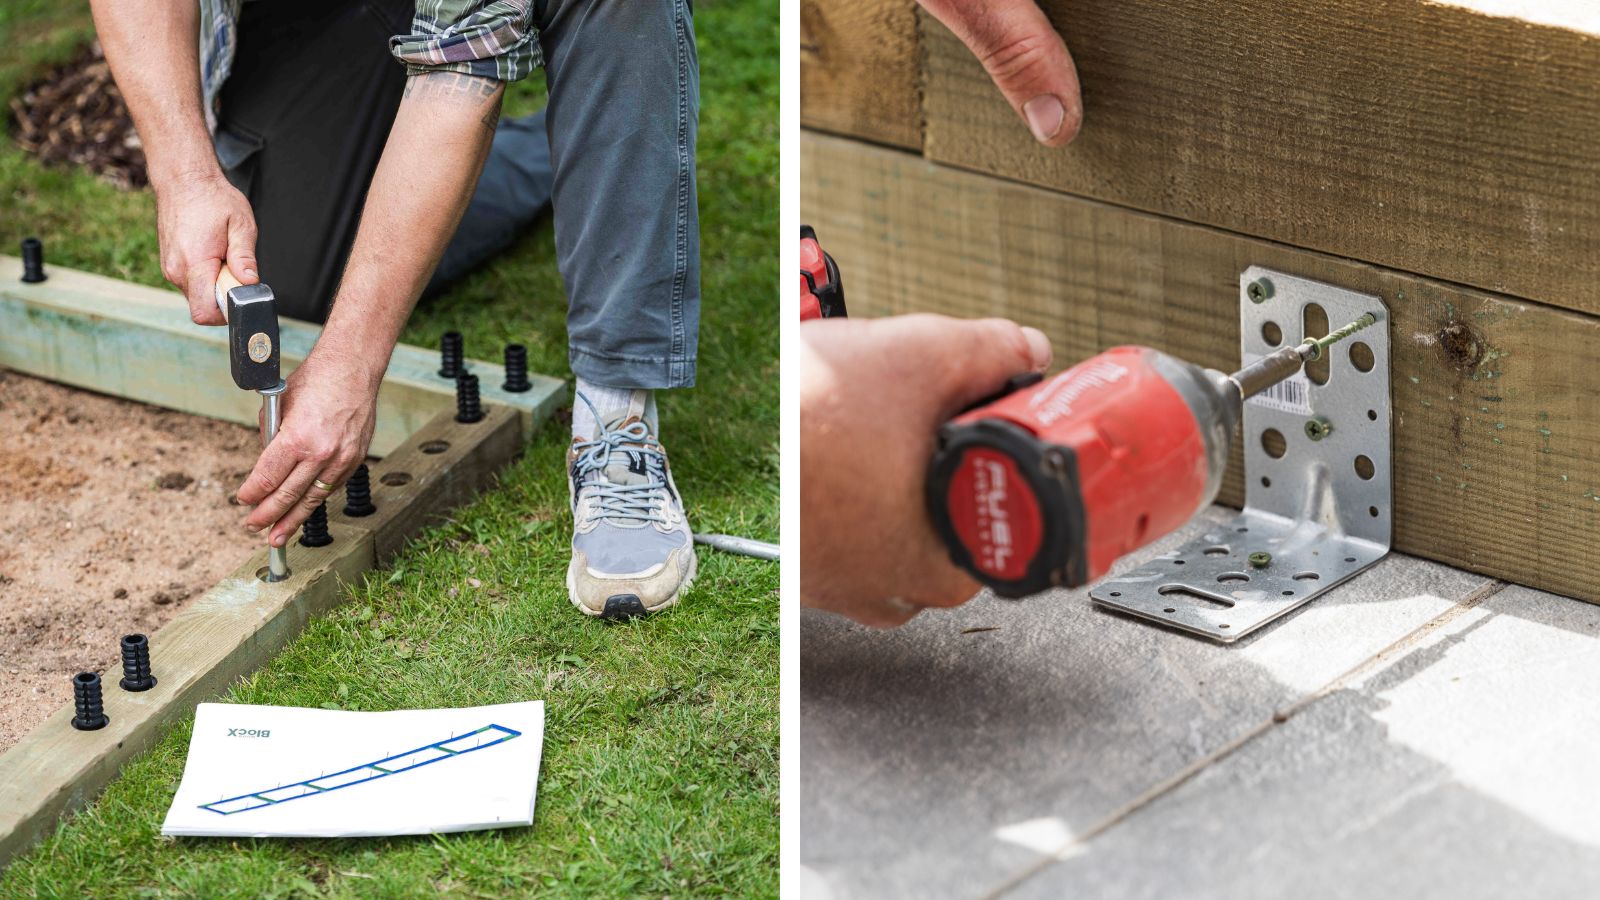
If you are building on grass or soil, now it’s time to install your kit’s ground spikes. These are used to secure your raised bed to soft ground. Following your instructions for placement, ground spikes should be hammered through the first layer of WoodBlocX. Please check your ground to avoid hitting any hidden pipework.
When ordering through our website, you can select which ground type fixings you require.
For hard ground types such as patios, decking and concrete your kit will include angle floor brackets which attach to the inside of the first WoodBlocX layer and the hard surface using the screws provided. It’s vital you check your ground type and use the correct drilling bit to avoid any issues.
#4 Building up your raised bed layer by layer
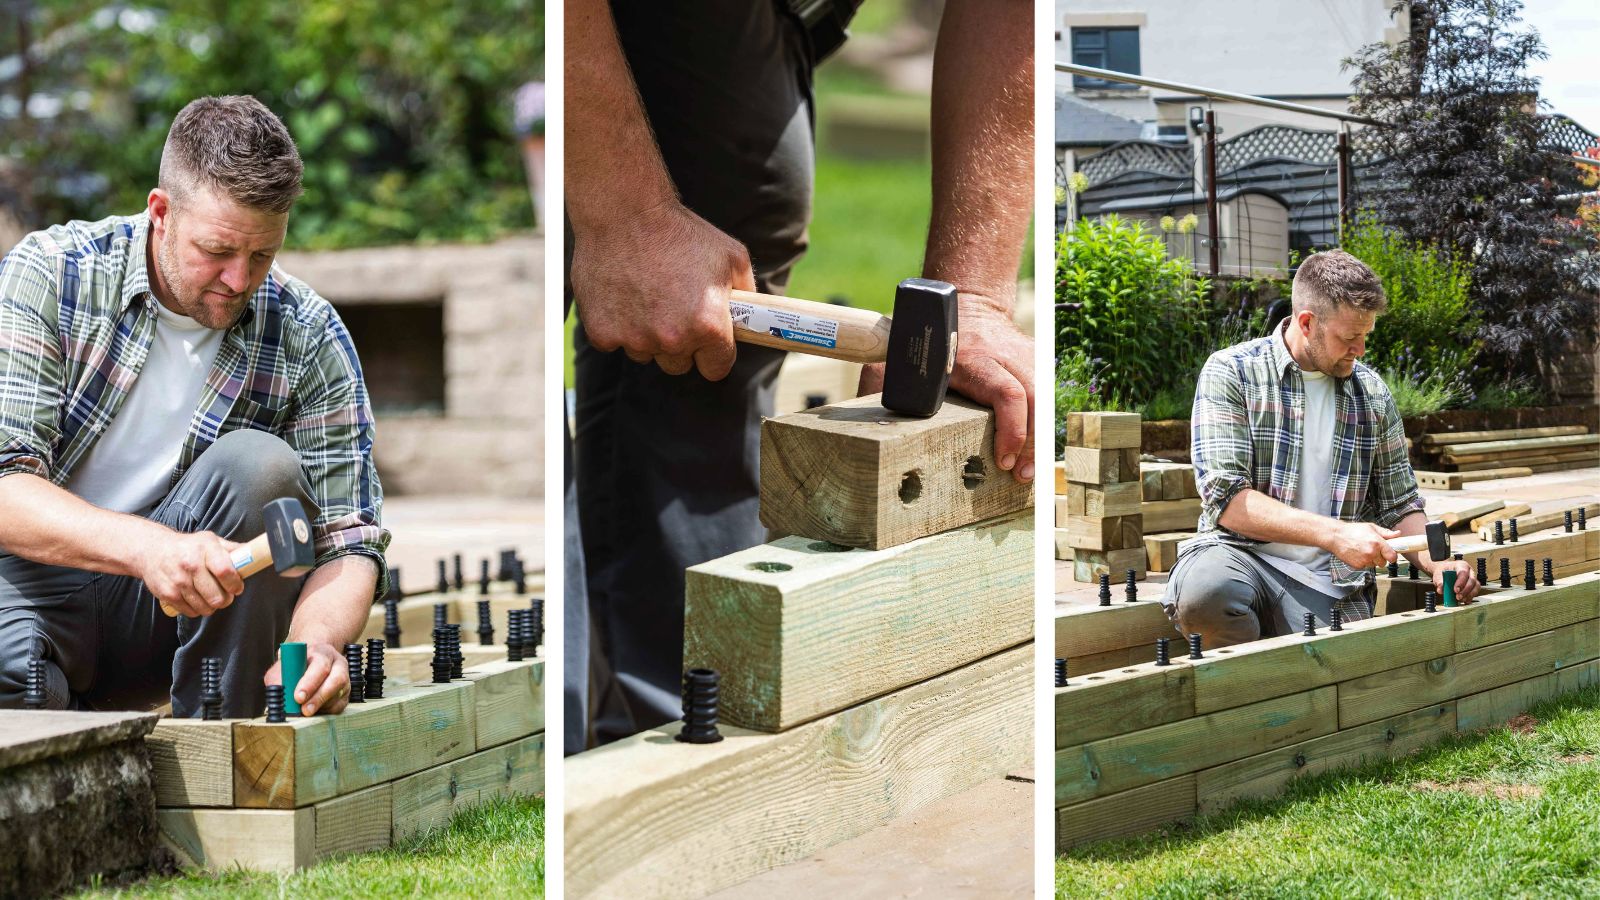
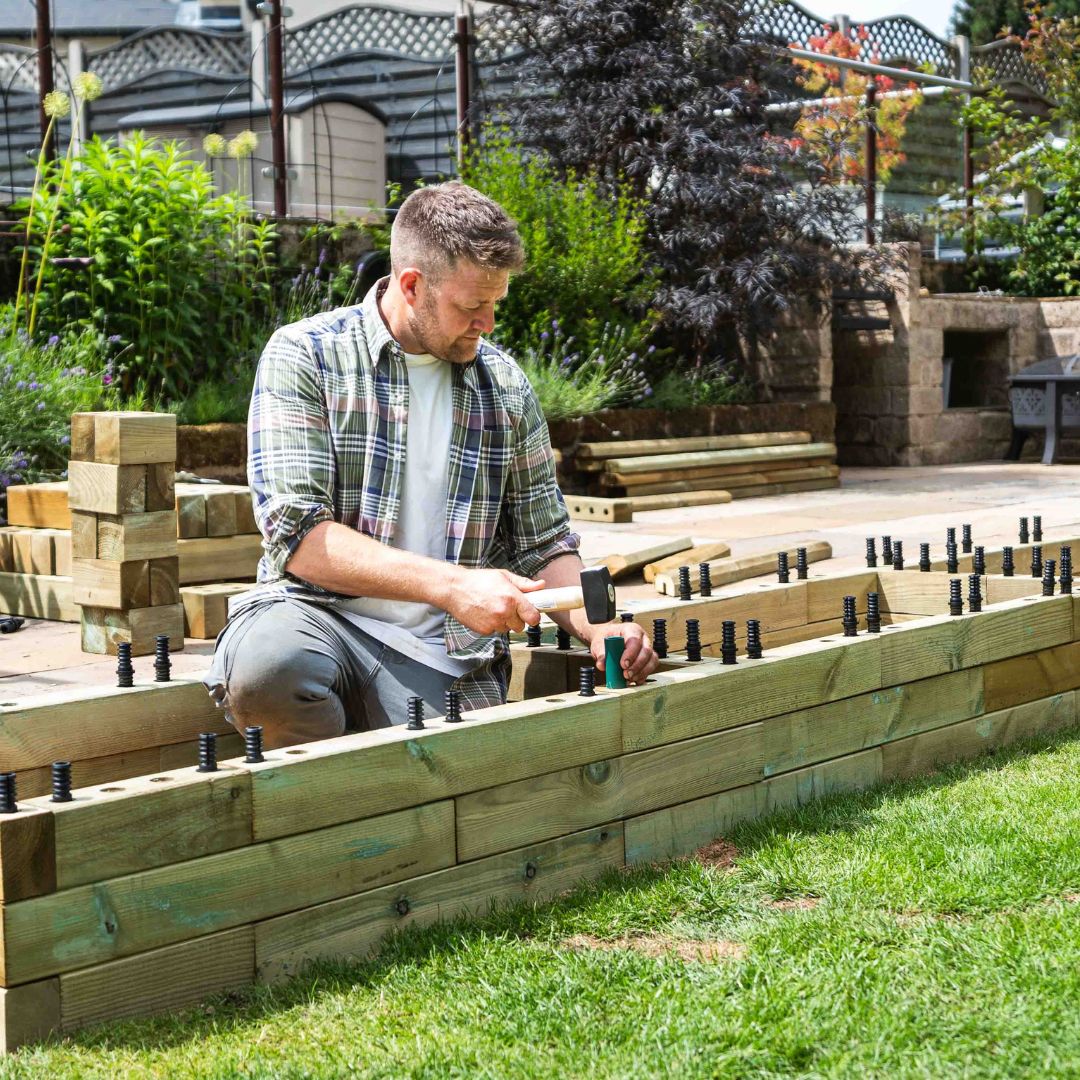
With your first layer complete and ground fixings installed, you can move on to hammering down your next row of WoodBlocX.
Following your instructions, insert the dowels into the correct holes and hammer them down using your green dowel protector to connect them with the row underneath. It’s this unique system that makes our raised beds super strong!
Continue this process, following your instructions to build your WoodBlocX raised bed layer by layer. If you need any support during your project, our friendly team is always here to help.
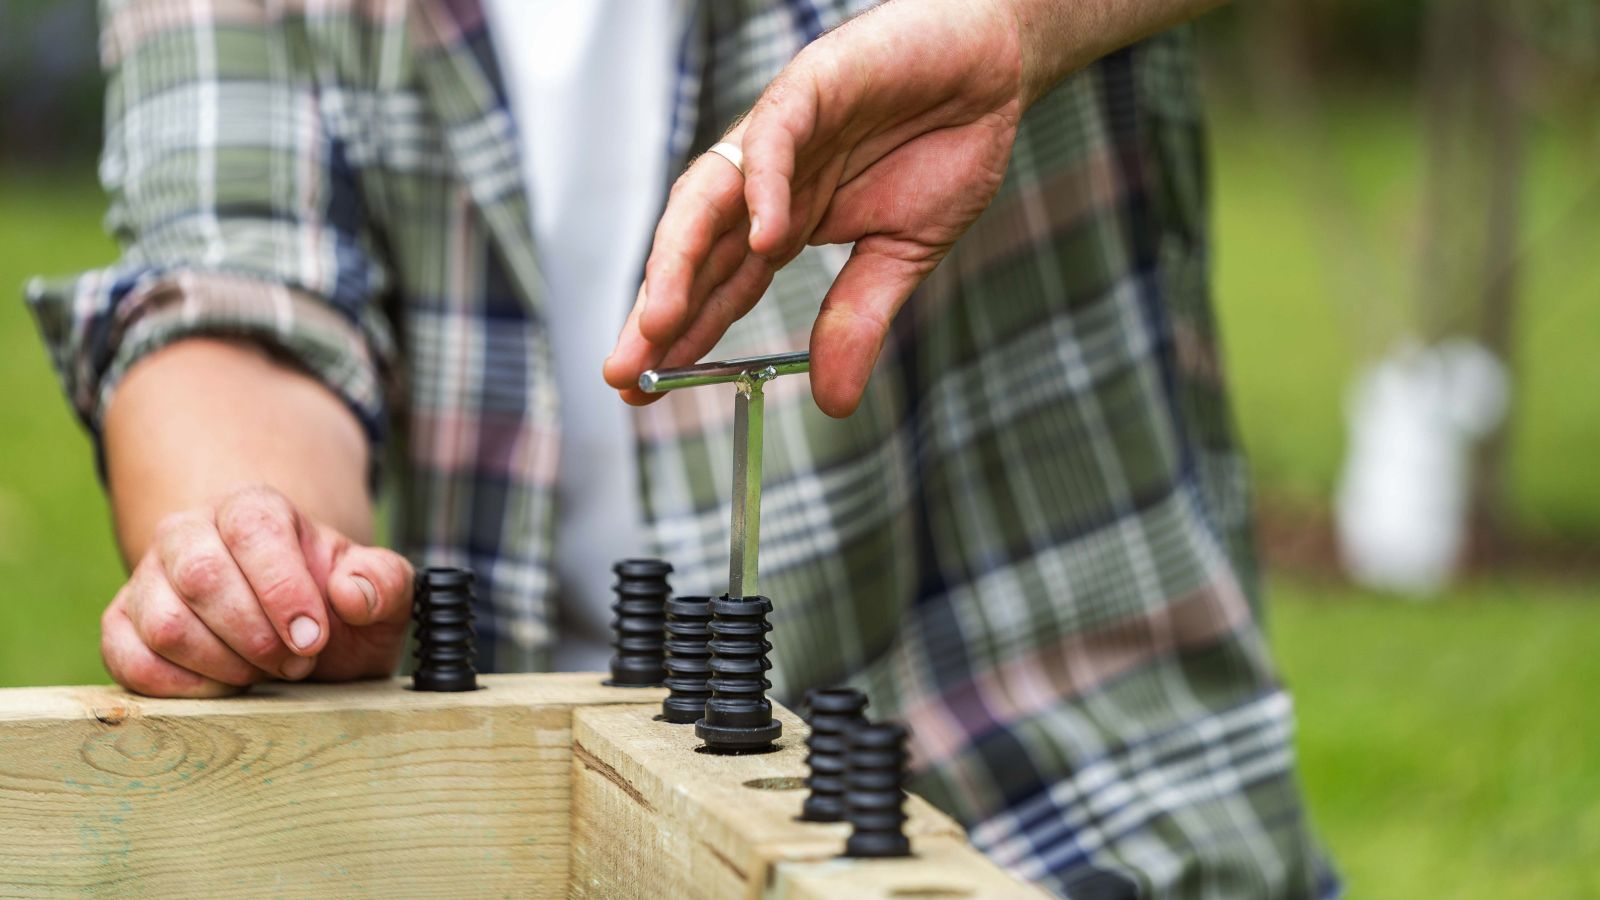 During the build, if you hammer a dowel into the wrong place, don’t panic! Simply use the dowel removal tool, which is included with your kit, to unscrew the dowel from its position and move on.
By now you’ll be getting the hang of it! Building up the layers is simple and it’s amazing how quickly your WoodBlocX raised bed starts to take shape. Don’t forget to check your levels throughout your build.
#5 Installing your protective liner
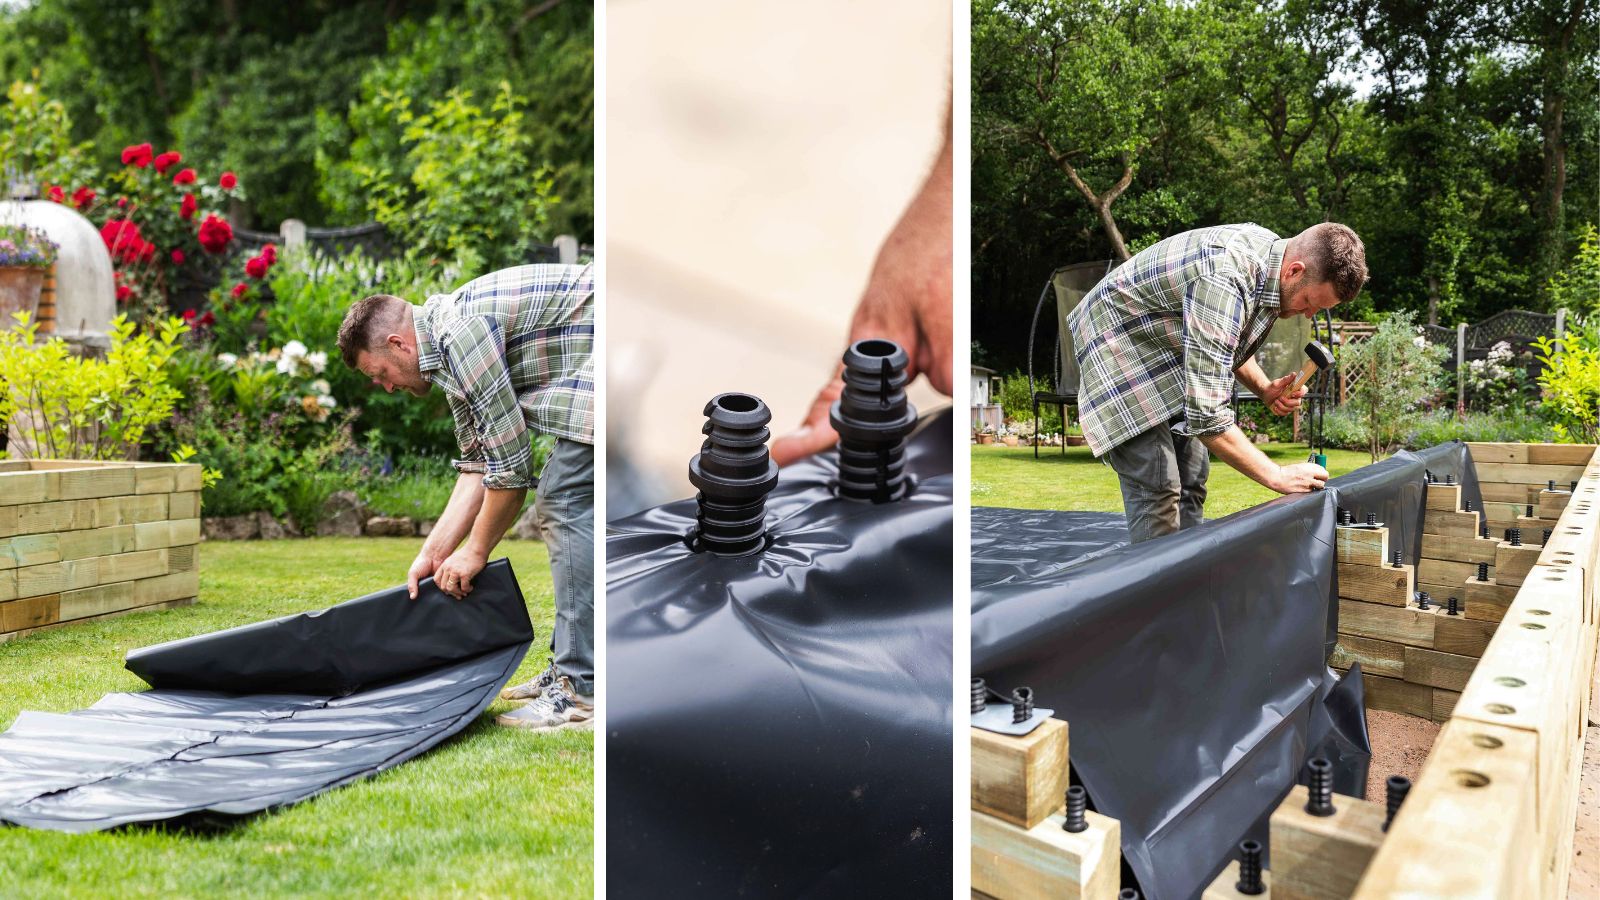
Just before you add your capping layer, it’s time to install your protective liner to maximise the lifespan of your WoodBlocX raised bed. You can choose to include a liner with your order or you can source your own.
Carefully cut the liner to size and work your way around the structure to secure it in place using your kit’s final layer dowels. These dowels are packaged in green bags and are shorter than the rest of the dowels in your kit. Make an incision in the liner and use your green dowel protector to hammer these through into position.
Installing a liner provides a damp-proof barrier between the WoodBlocX timber and soil and is strongly recommended in all our structures. If you forget to install your liner under the capping layer, you can staple, nail or screw it to the inside of your structure later in the build.
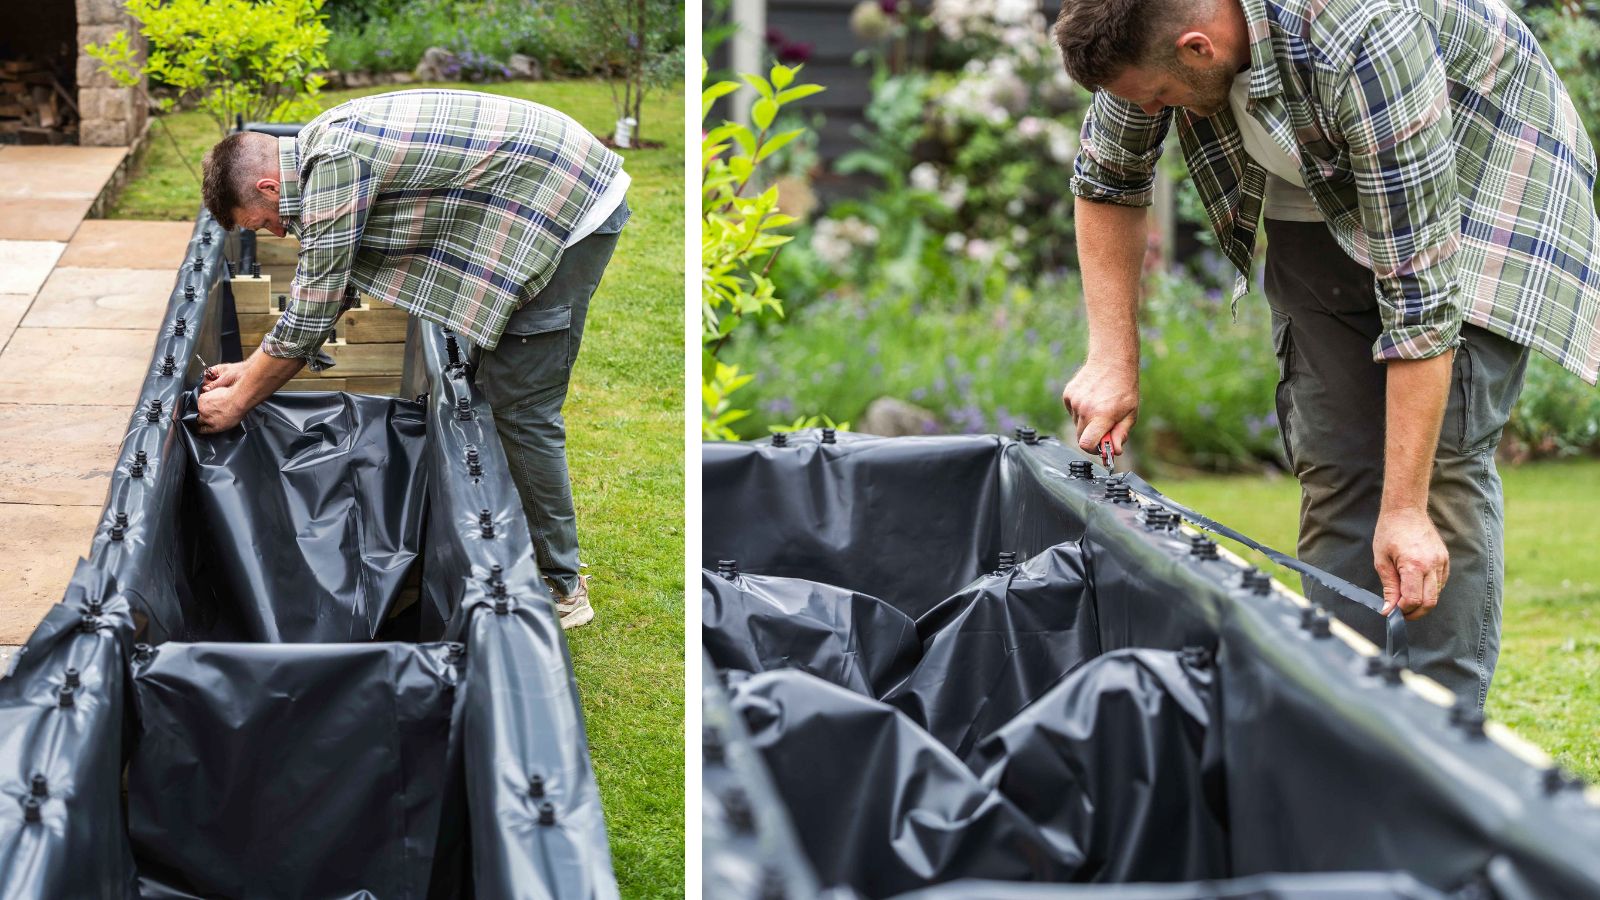 If your raised bed includes internal supports, it’s vital you make sure these are covered with protective liner too. Using a sharp blade, carefully trim excess liner. Cut close to the final layer dowels for a neat finish.
#6 Hammering down your final capping layer
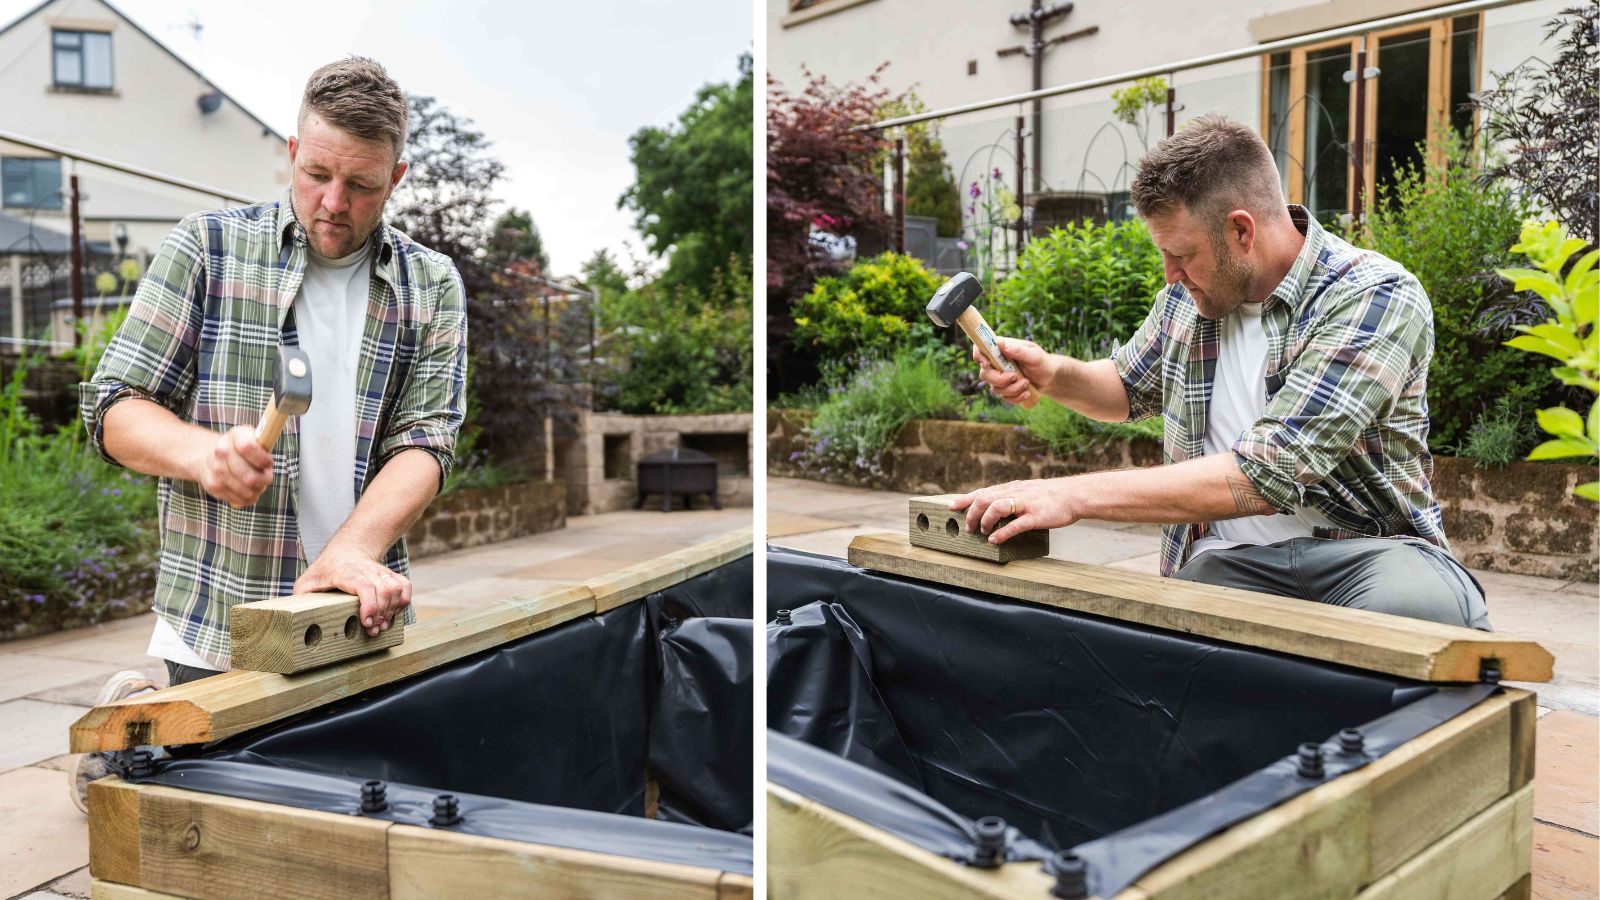
Now your WoodBlocX raised bed is built and lined, it’s time to install your last row of angle corner plates and hammer down your final capping layer to complete your design. We offer two types of capping styles, Traditional or Modern, which can be selected when ordering through our website.
Starting with a corner piece, work your way around the raised bed, hammering down the capping using a spare block to protect the timber underneath. Force may be required to close the gap between the capping layer and liner. Follow the number of holes highlighted in your layer by layer buildings instructions to identify the capping needed for each section of your raised bed.
#7 Add a drainage layer and fill with soil
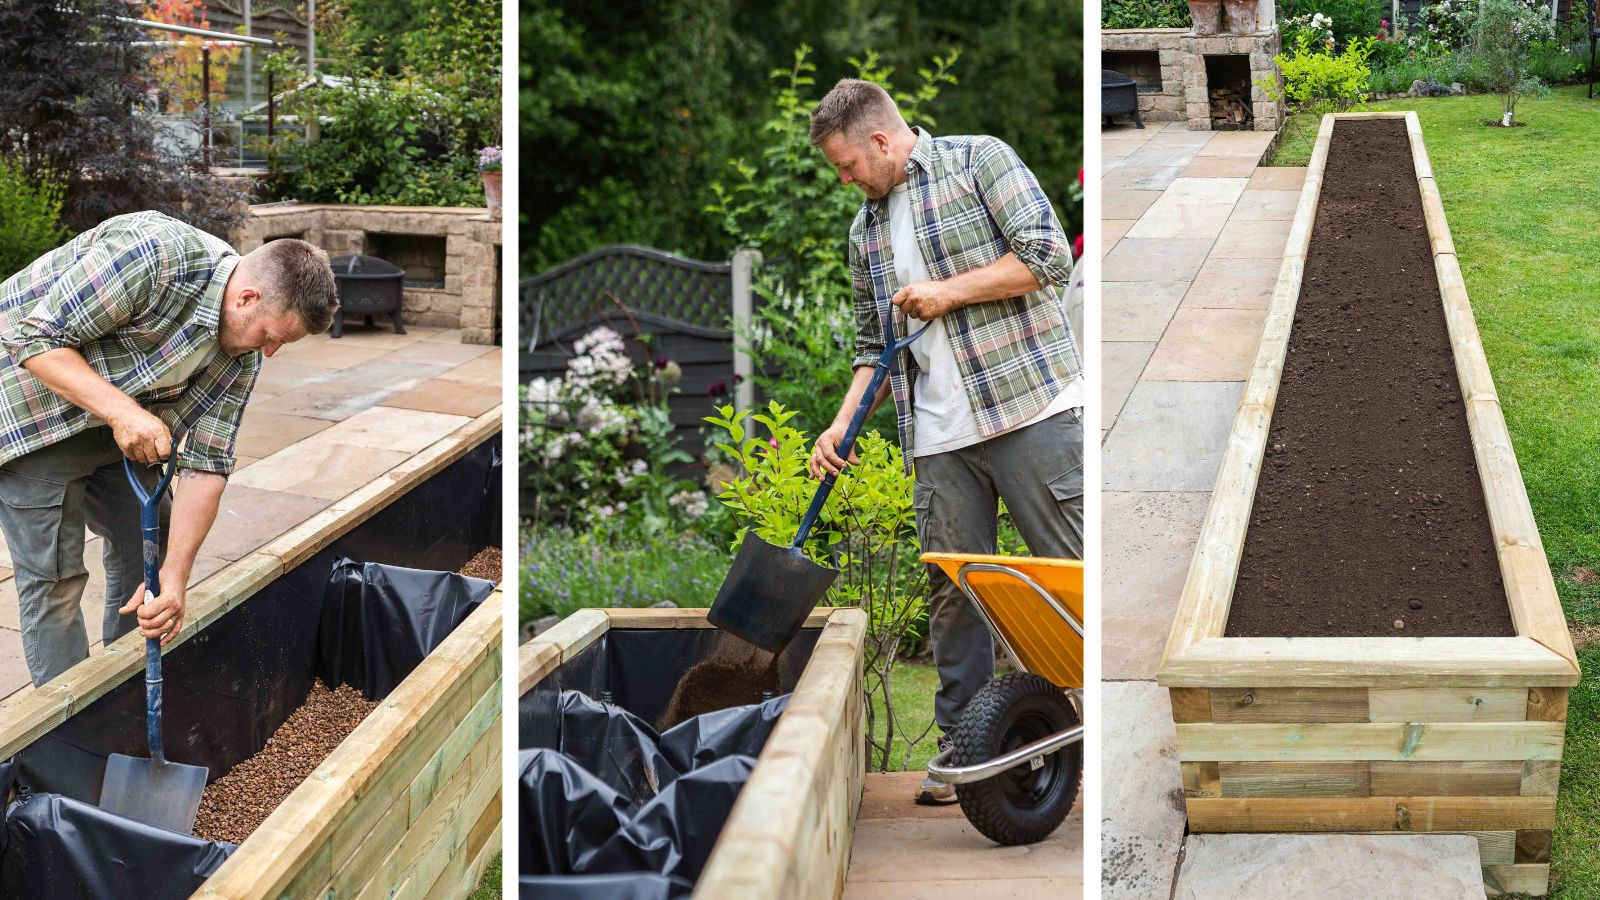
Next, we recommend adding a drainage layer. Gravel, stones or wood cuttings can help to improve soil health. Then, the final step is to fill your WoodBlocX raised bed with good quality soil!
If you need support calculating the soil volume of your structure, contact our team. To reduce the amount of soil needed, always add a drainage layer and you can even put logs, branches and organic matter at the bottom. Healthy soil supports healthy plants so choose the best mix for what you plan to grow.
#8 Plant up and admire your new raised bed
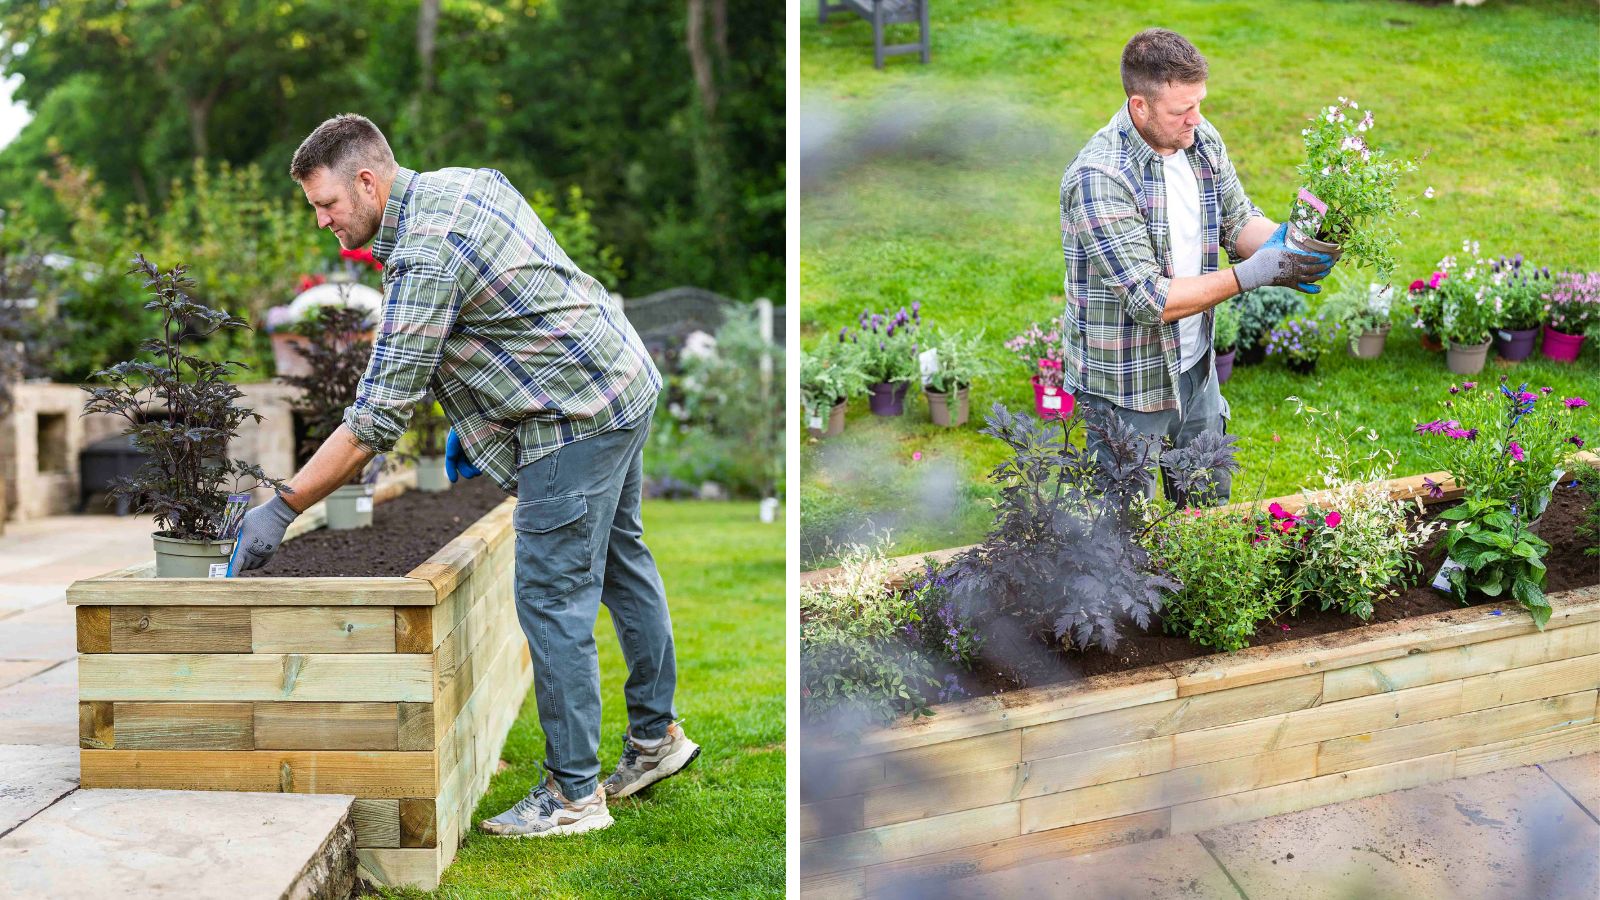
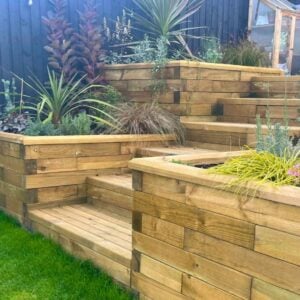
For the project photos shown on this page, a variety of perennials and annuals were planted to provide year-round interest, helping to create a beautiful divide between the garden and patio. But, the choice of what you plant and grow in your WoodBlocX raised bed is completely up to you!
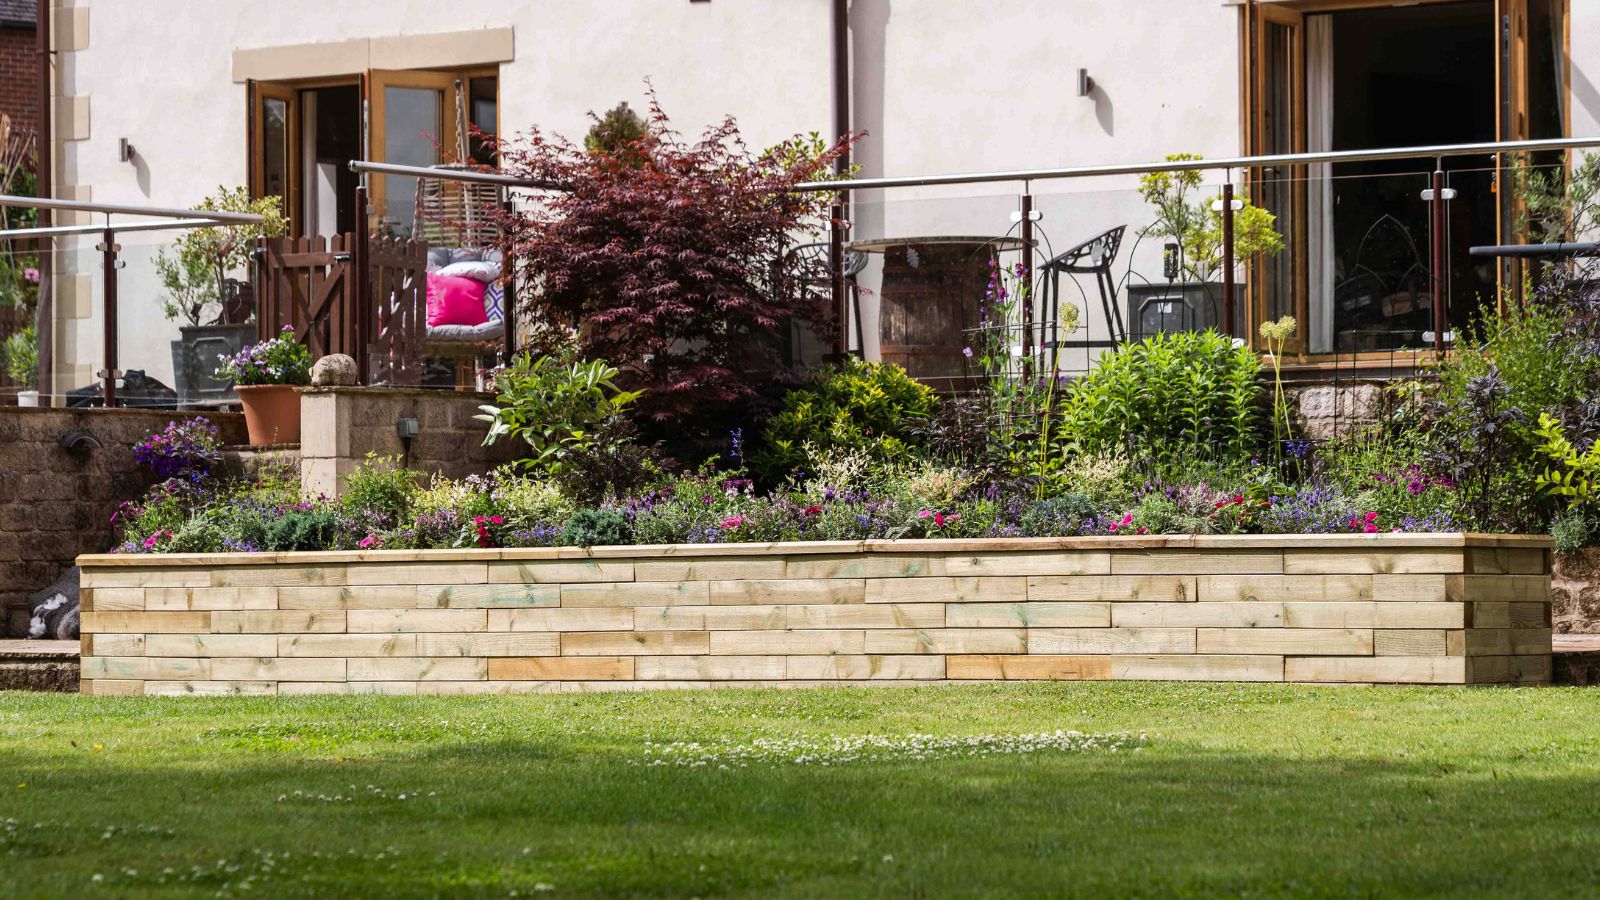
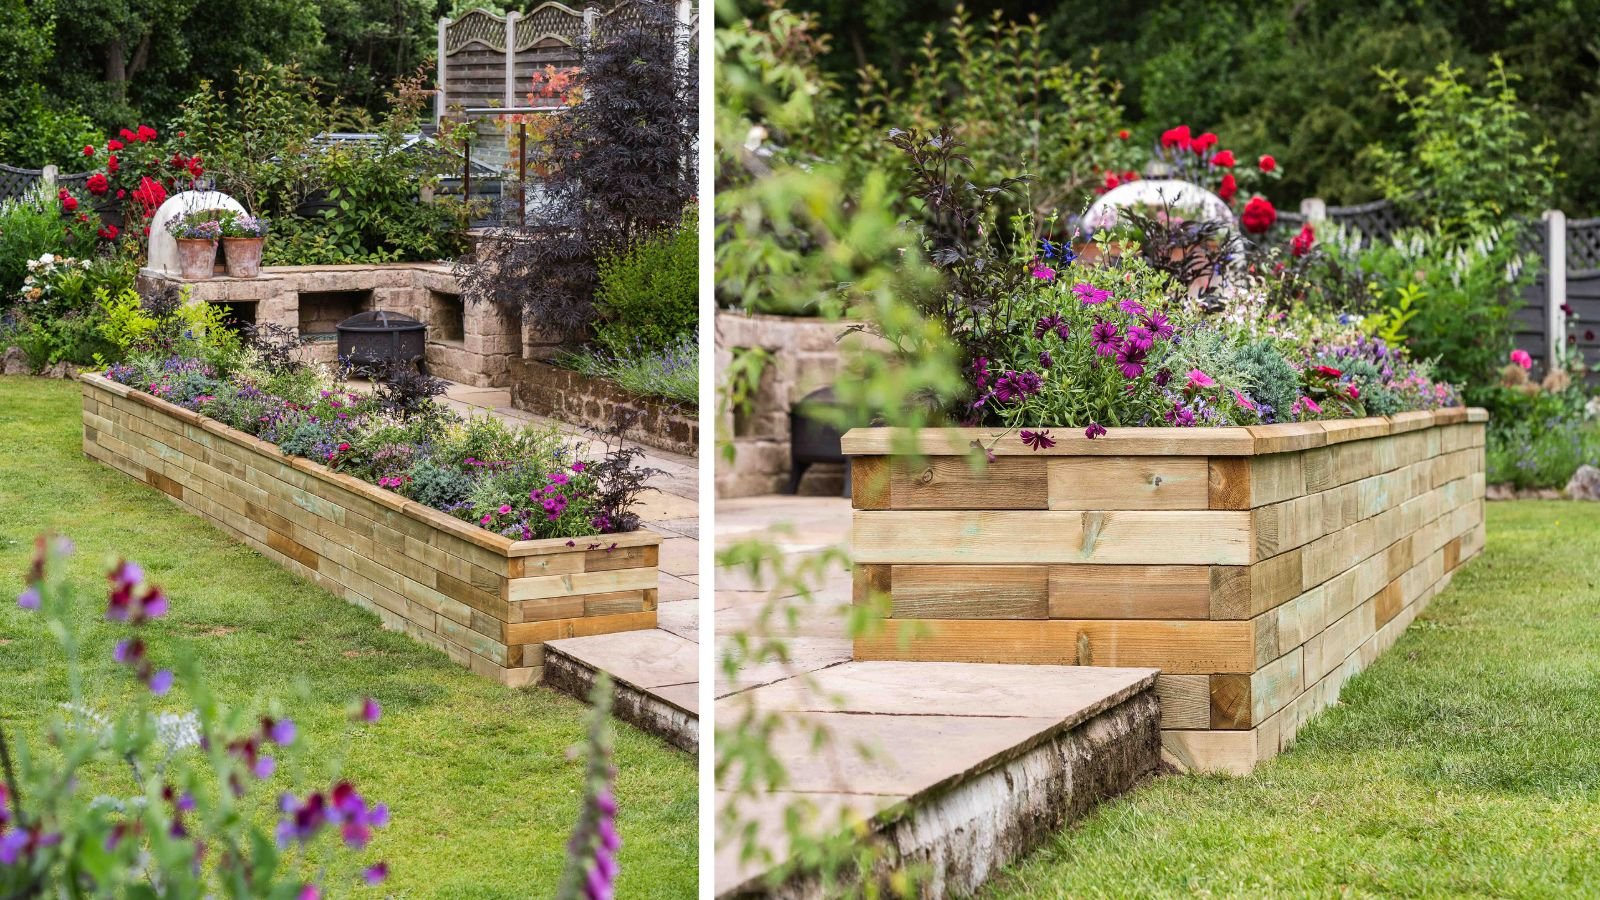 And there you have it…JOB DONE! A beautiful WoodBlocX raised bed that you can be proud of, built without power tools or any cutting required.
Transforming your garden has never been easier. So, what are you going to grow?
Common raised bed building questions
Do WoodBlocX raised beds need a liner?
We always recommend using a liner with our raised beds, this provides extra protection for the wood to ensure you get the maximum lifespan out of your structure. Please read our helpful guide about how to install a liner – liner should be installed before adding your finishing capping layer. If you forget, you can also staple, nail or screw your protective liner to the inside of your structure.
How much soil do I need for my raised bed?
You can easily work out how much soil you need using this simple sum: length(m) x width(m) x height(cm), but if you are adding a drainage layer to the bottom subtract the height of the layer from the equation so you don’t over order. Our team is here to help if you need any support with this.
Where can I find more support to help me when building my raised bed?
We have a YouTube channel that’s packed full of helpful videos and a Helpdesk with answers to common customer questions. You will also find our General Building Guide attached to your order emails. Reading our positive feefo reviews is also a great way to get some tips and tricks from previous customers who have completed their own WoodBlocX projects.
Where can I find real-life customer garden projects to get inspired?
On our website, we have a huge variety of Customer Garden projects to see – from full garden transformations to small planter projects, there’s something to see across gardens of all shapes and sizes.

Design your perfect raised bed
WoodBlocX raised beds are really easy to build because everything you need is included in your kit! Simply select your ideal raised bed size using our website's clever calculator tool. We even offer a Free Design Service if you need something bespoke for your garden