Understanding your kit’s layer-by-layer building instructions
Everything you need to know to help your WoodBlocX build go smoothly!
Layer-by-layer building instructions are included with every WoodBlocX design – it’s what makes our timber system so unique and easy to build! Whether you are installing a raised bed, a garden pond, a retaining wall or garden furniture, you will receive a simple to follow set of colour-coded instructions that highlight how to build each layer of your design with no steps skipped.
When accompanied with our General Building Instructions PDF, which is full of useful hints and tips, you’ll have all the information you need for a successful WoodBlocX project. As standard, we attach your layer-by-layer building instructions for your specific design to your order confirmation emails. However, if you prefer a hard copy, you can include printed instructions with your order.
In this blog post, we’ll take a closer look at each page of the layer-by-layer instructions. As always, if you have any further questions, our friendly customer service team is here to help.
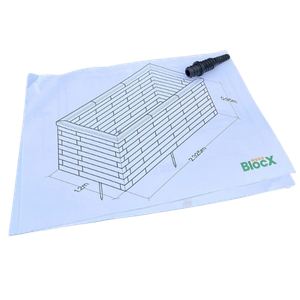
Your WoodBlocX Design
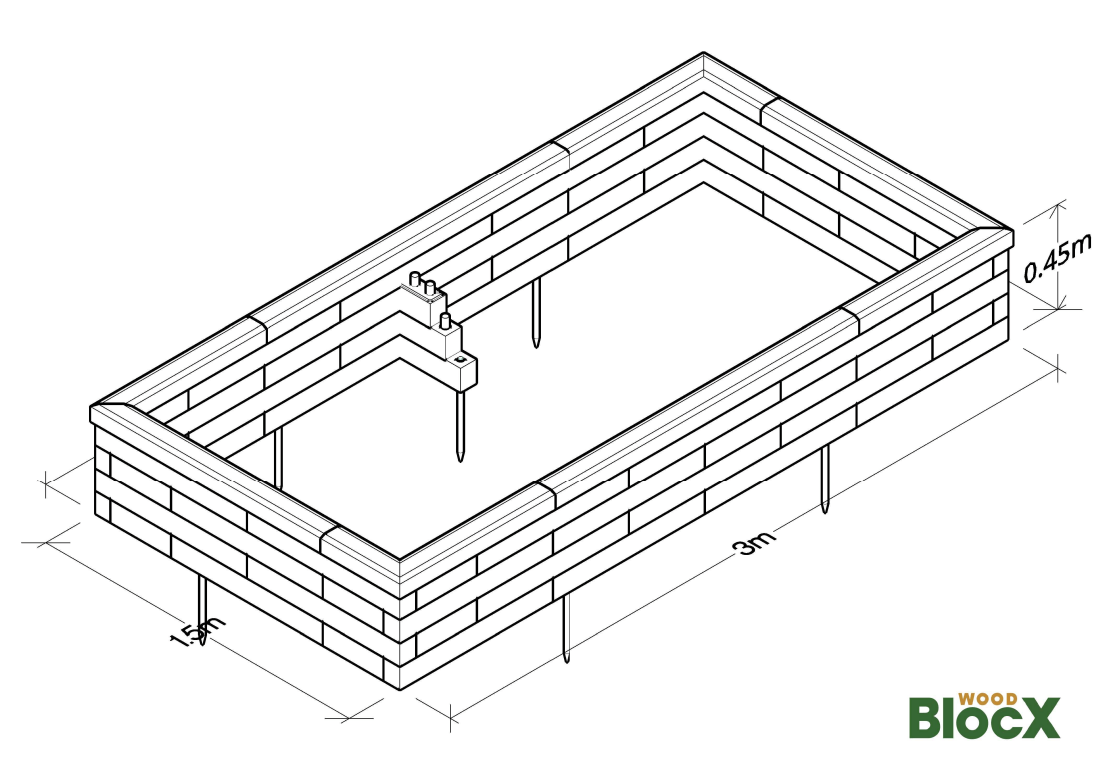
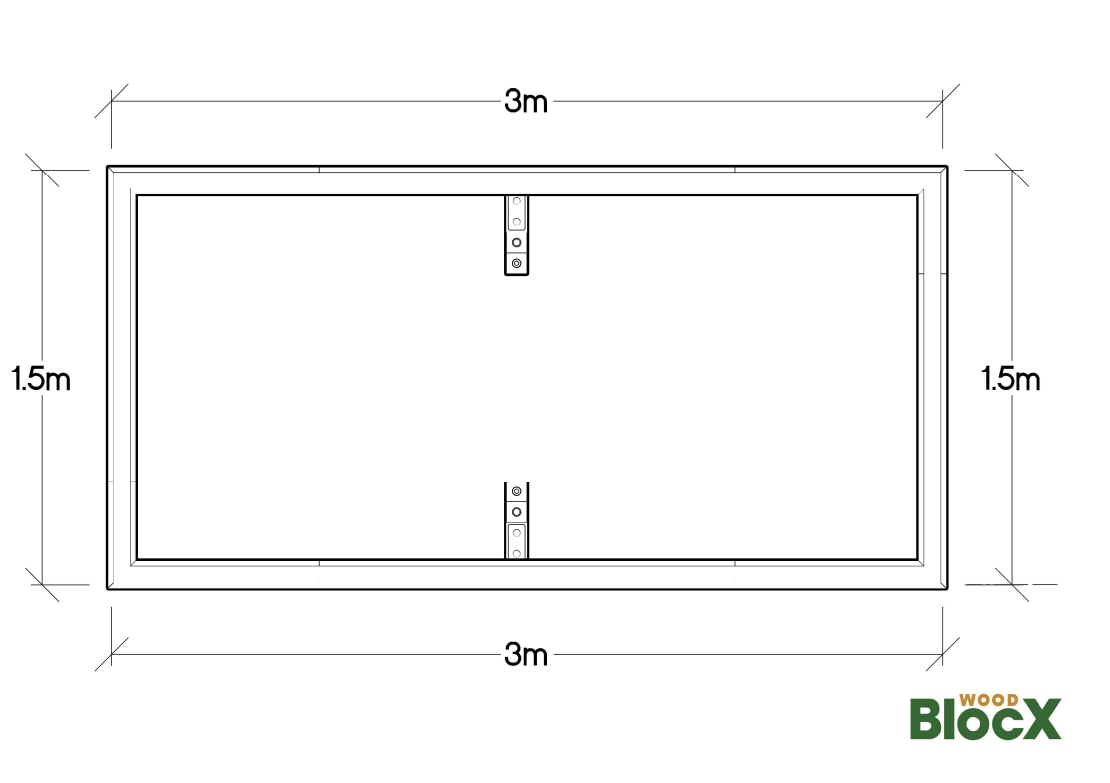
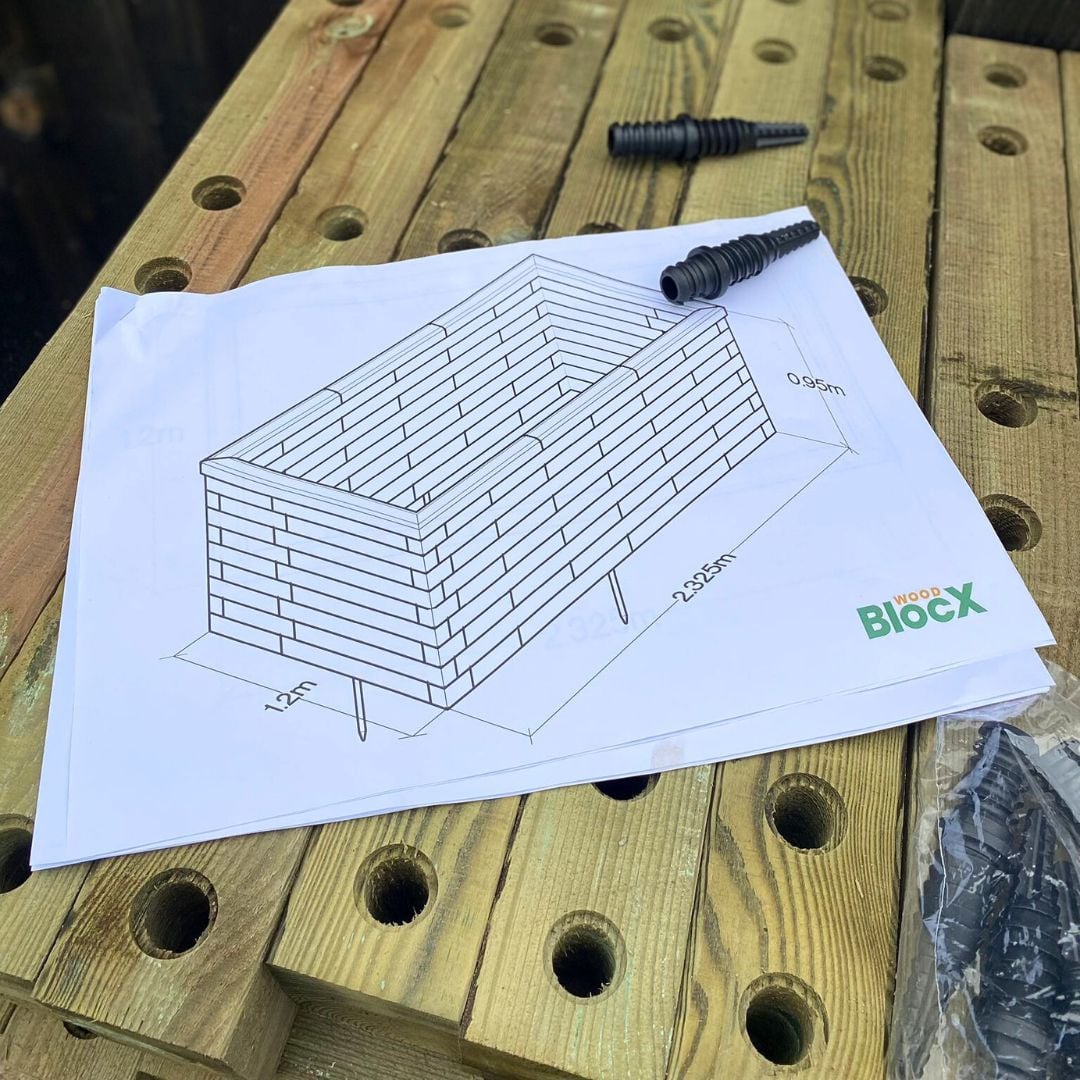
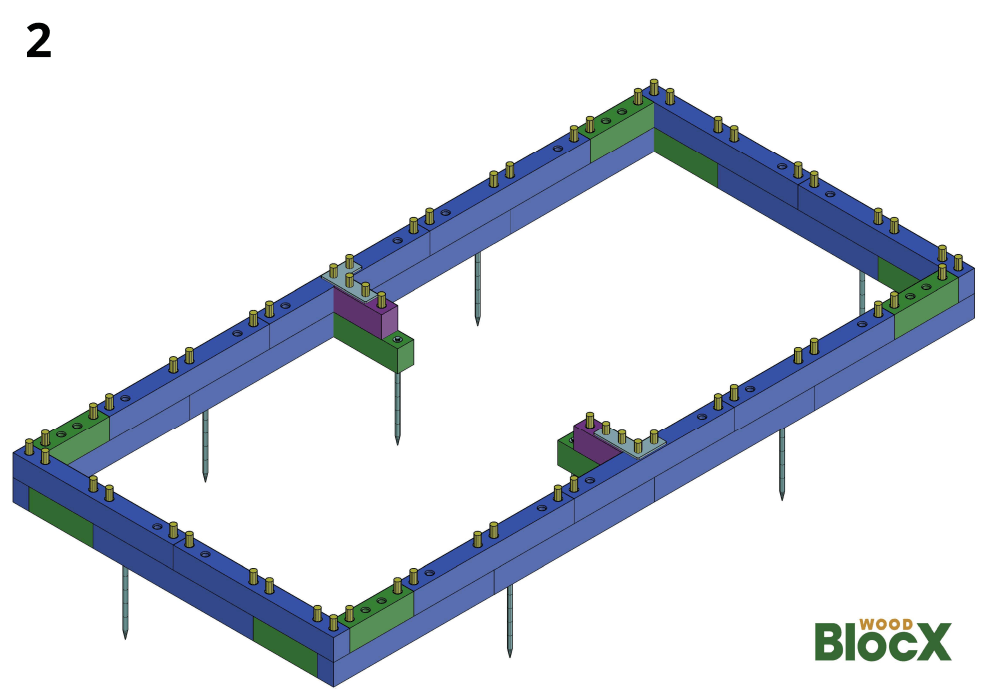
The first two pages of your kit’s layer-by-layer instructions include detailed technical drawings of your chosen WoodBlocX design. The isometric and plan images will detail the size of your design and highlight where your ground fixings and internal buttress supports need to be installed. Please take a moment to check the size stated in your building instructions matches the design you have ordered.
For customers using our Free Design Service, speak to your dedicated designer if you have any questions about your instructions.
Don’t just take our word for it…WoodBlocX customers love their detailed building instructions.
“The instructions are superb and better than anything I have experienced with any project previously.”
Check your kit's components on the last page
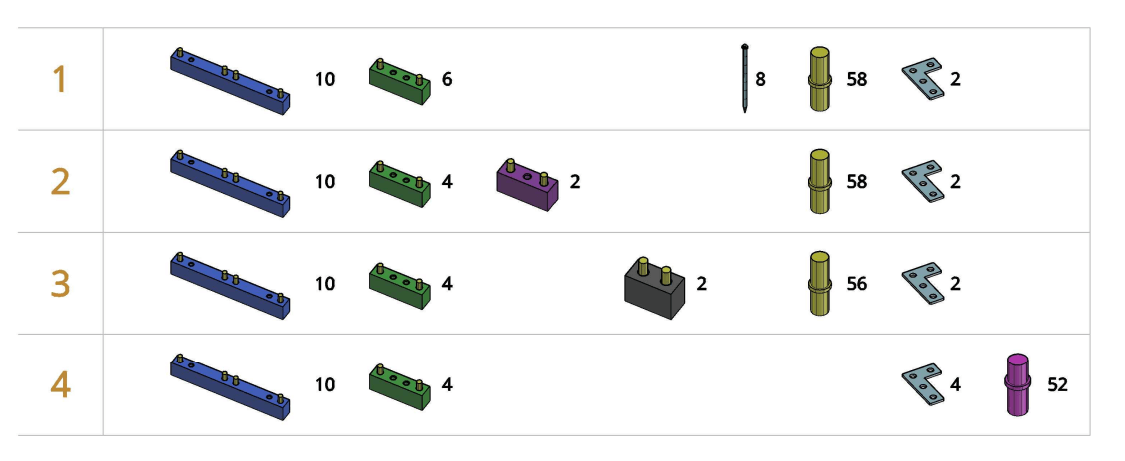
Before you progress any further with your build, flick to the last page of your layer-by-layer instructions to check the components list required for your WoodBlocX design.
On this page, you’ll find a breakdown of the BlocX pieces and accessories you need to build each layer. Everything is colour-coded to make components easy to identify. If you think you might be missing anything, please contact us. Please note: capping pieces are not shown on this components list. For more information on this, please read the section titled ‘Adding your capping layer‘ further down in this blog post.
WoodBlocX dowels are now included in two different sizes. Standard dowels (marked in yellow) are to be used in the main structure with final layer dowels (marked in purple / packed in green bags) to be installed only underneath the final capping layer.
Building your first layer and installing ground fixings
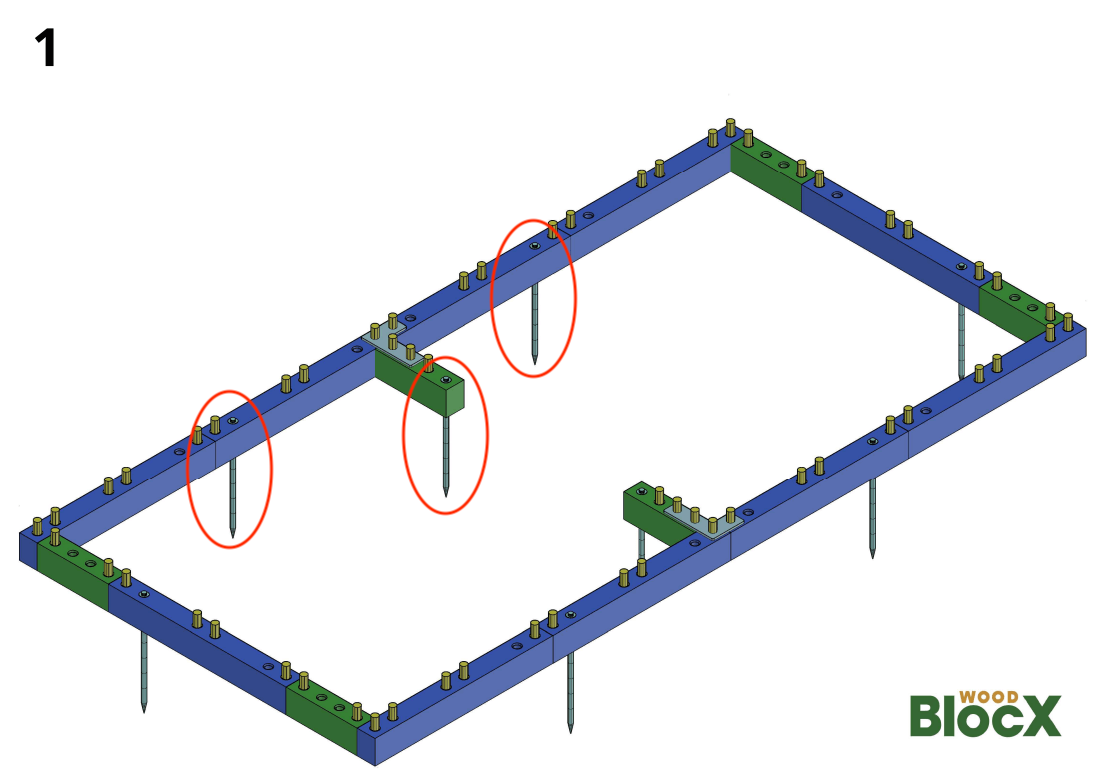
Installing the first layer of your WoodBlocX kit is the most important part of the build so do take your time on this page! It’s vital you build on a suitably level surface to make sure your design is structural stable and subsequent BlocX layers fit properly. For more information about preparing your ground, please read our complete how to build guide.
On this page of your instructions you will see how to lay out your first row of BlocX and where to install your ground fixing options; ground spikes (soft) or angle floor brackets (hard). For designs over 2metres in length or over 25cm in height, you will also see where to begin installing your supporting internal buttresses which are attached to the main structure using angle corner brackets (follow the instructions for placement).
If your design includes angle floor brackets and is going to built on hard ground such as patios, concrete or paving, your instructions may look like this:
Building up the rows layer by layer

After building the first layer, now the real fun begins building up your design row by row! It’s amazing how fast your design comes to life following the instructions page by page. It’s important to remember that the configuration of blocks alternates at each level so pay attention to the colour-coded BlocX in your design. It’s this unique building system that gives WoodBlocX kits their durability.
Top tip to speed up your build: To save time looking at your instructions for dowel placement at each layer, simply look down the holes and insert a dowel where you see one underneath!
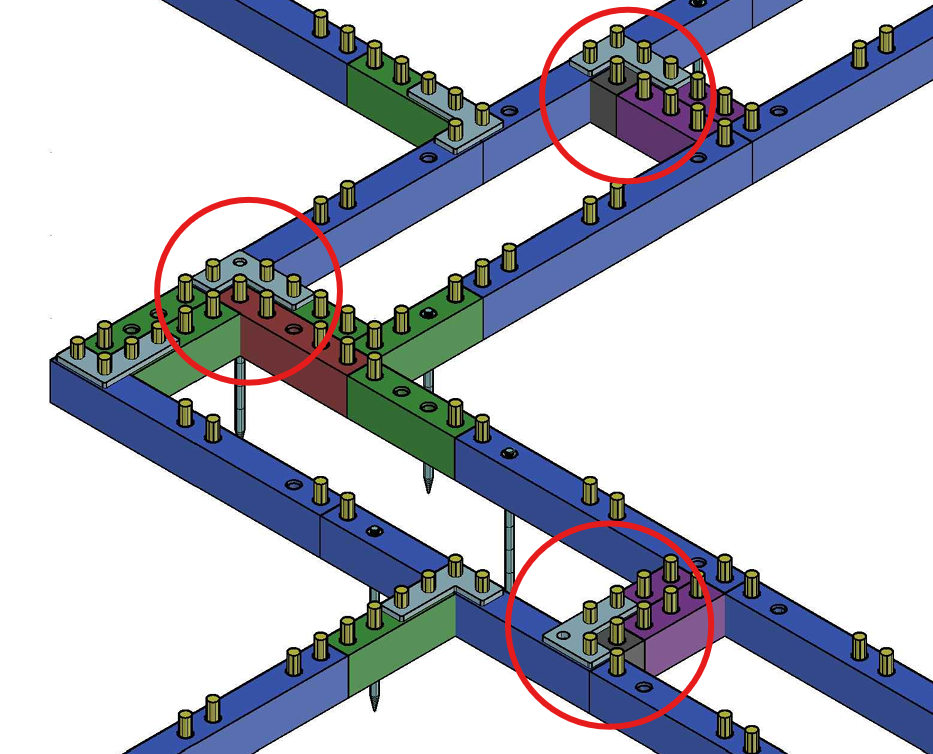 A word of advice for more complicated WoodBlocX designs that include lots of internal supports with adjoining angle corner plates…
“Angle corner plates in your instructions can sometimes hide what BlocX configuration is required underneath – look closely at the number of dowels poking through to ensure you install the correct BlocX underneath.”
Installing your final layer dowels (purple) on the last row
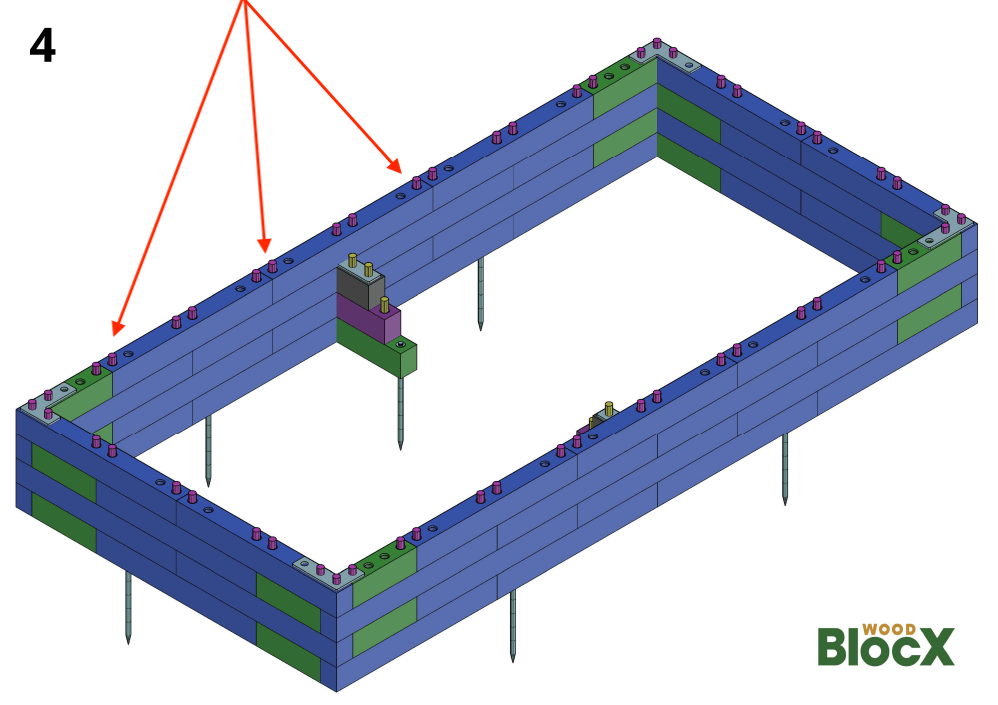
When the dowels in your layer-by-layer instructions change from yellow to purple, you’re at the final WoodBlocX layer. It’s time to hammer down your final layer dowels, ready for the finishing capping. You’ll also see on this layer, angle corner brackets are installed at the corners to provide extra strength.
Final layer dowels are packed in green bags, marked in purple in your instructions and are shorter than the rest of your dowels in the kit. If you have used these dowels earlier in your project, don’t panic – you can just cut down our longer dowels.
It’s at this point that we also recommend installing a protective liner. You can trap the liner between the last layer of WoodBlocX and the final layer dowels for a very neat finish (see instructions).
To maximise the lifespan of your WoodBlocX structure, we always recommend installing a liner… our customers have lots to say about our raised bed liner.
“Really good quality and plenty to finish the job. Sits neatly and securely between the top capping layer. Great additional protection for raised beds that will hopefully last for years!”
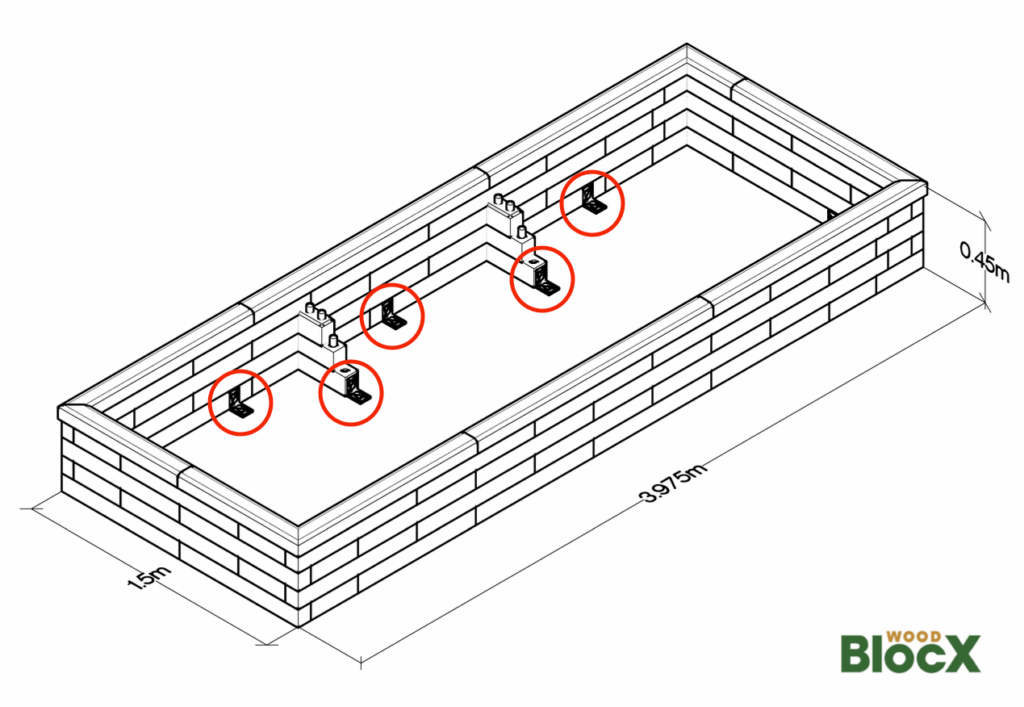
Adding your capping layer
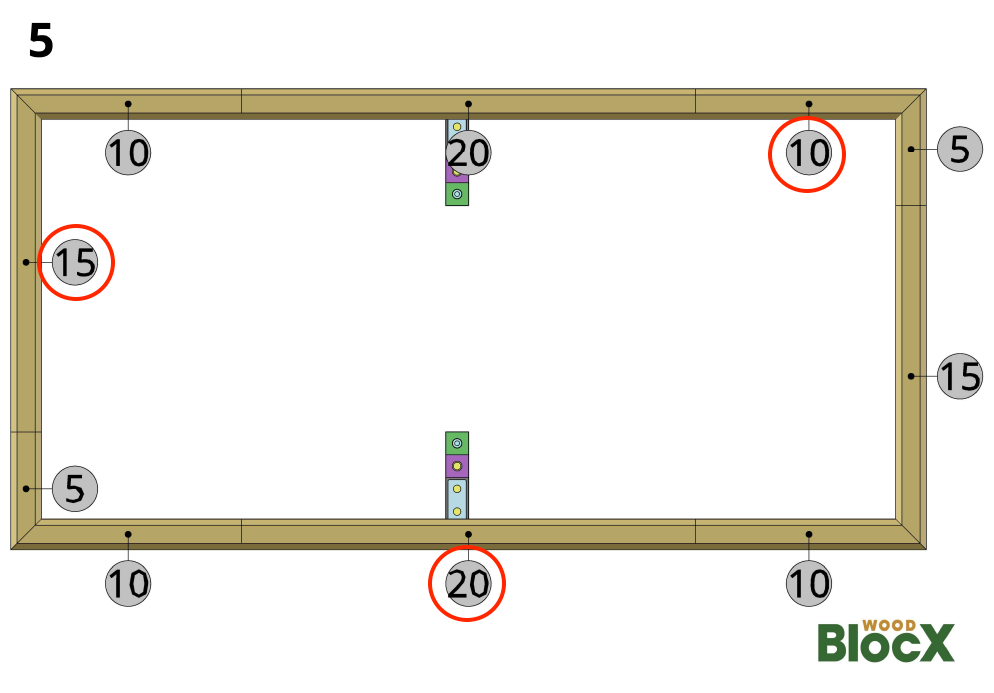
The last page in your layer-by-layer instructions details where to hammer down your capping layer to complete your WoodBlocX design. The numbers highlighted in the circles correspond to the number of drilled holes on the underside of your capping lengths. Please note that ‘half holes’ under your capping are counted as ‘full holes‘ in your instructions!
Capping is available in two styles: traditional or modern but both options are installed in the same way. Use a spare piece of timber to protect the capping when hammering down – force may be required to close the gap between the capping and the last layer of WoodBlocX. Start at any corner and work your way around the structure to finish your build.
From the team at WoodBlocX, good luck with your build, we hope you enjoy your project and your structure for many years to come!
Include printed instructions with your order
Did you know you can add printed instructions to your order? Bespoke to your design, they'll save you the hassle of looking at your mobile or laptop in the garden. Perfect if you don't have a printer or just like good old-fashioned paper instructions!