


How to Build a Pétanque Court
WoodBlocX makes it possible to create an attractive pétanque court without having to construct a traditional timber frame from scratch.
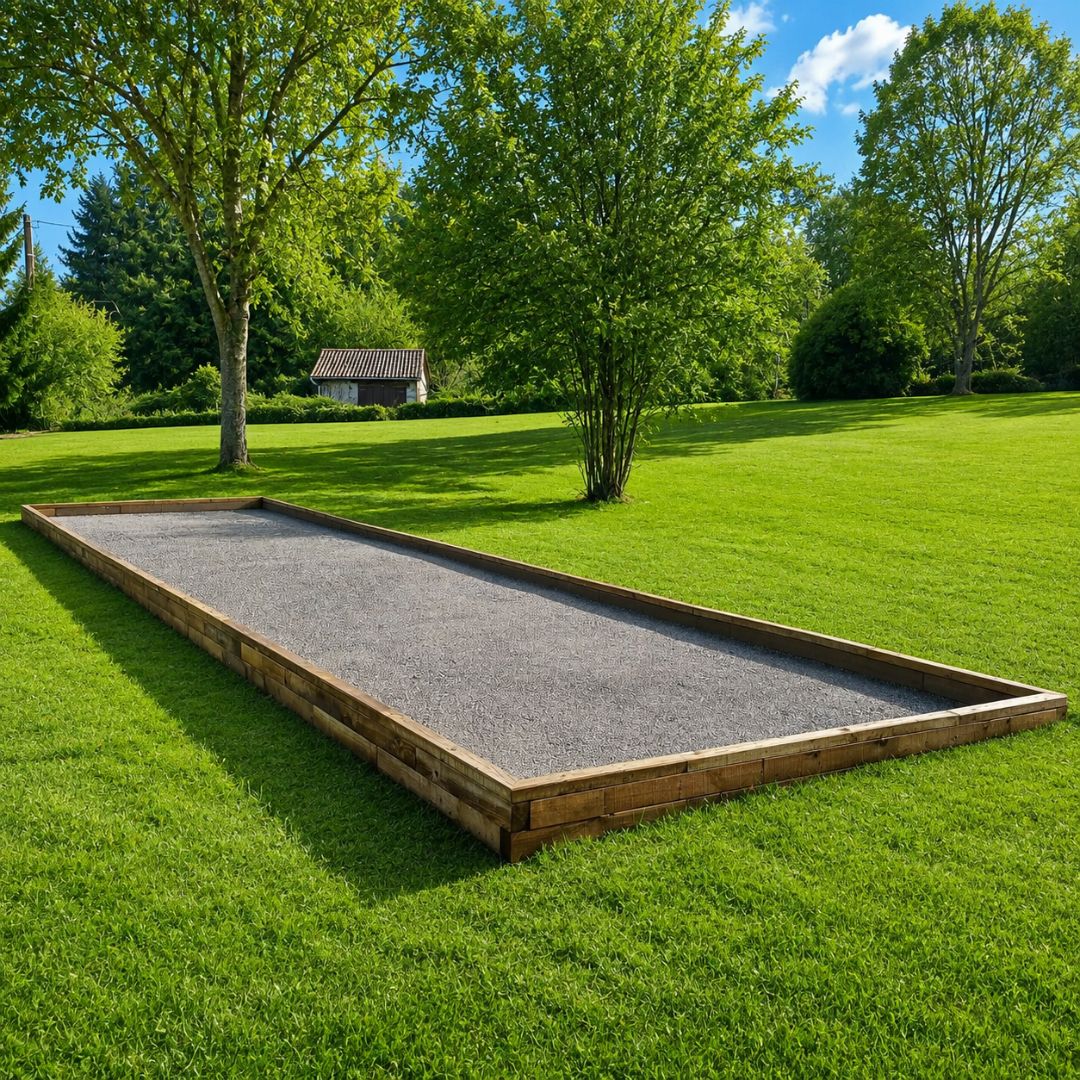
There is something wonderfully simple about pétanque. All you need is a set of boules, a suitable playing surface and a few friends – and you have everything required for an afternoon of relaxed competition.
Originating in France, pétanque is a form of boules where players throw or roll metal balls as close as possible to a small wooden or resin target ball, known as the ‘cochonnet’. It can be enjoyed by players of almost any age or ability, making it a brilliant addition to a family garden, holiday home, hotel, pub, community space or holiday park.
And while you could head to your local pétanque club, creating your own court means the game is always ready whenever you are. A garden pétanque court can become a real social hub – perfect for summer parties, family gatherings and those long evenings when nobody wants to go home.
Building a court might sound like a major landscaping project, but using our WoodBlocX system makes creating the surrounding structure surprisingly straightforward. The timber blocks are supplied ready to assemble, so there is no cutting or sawing required. Read on to find out how to build your own pétanque court using WoodBlocX.
Step 1: Design your WoodBlocX pétanque court
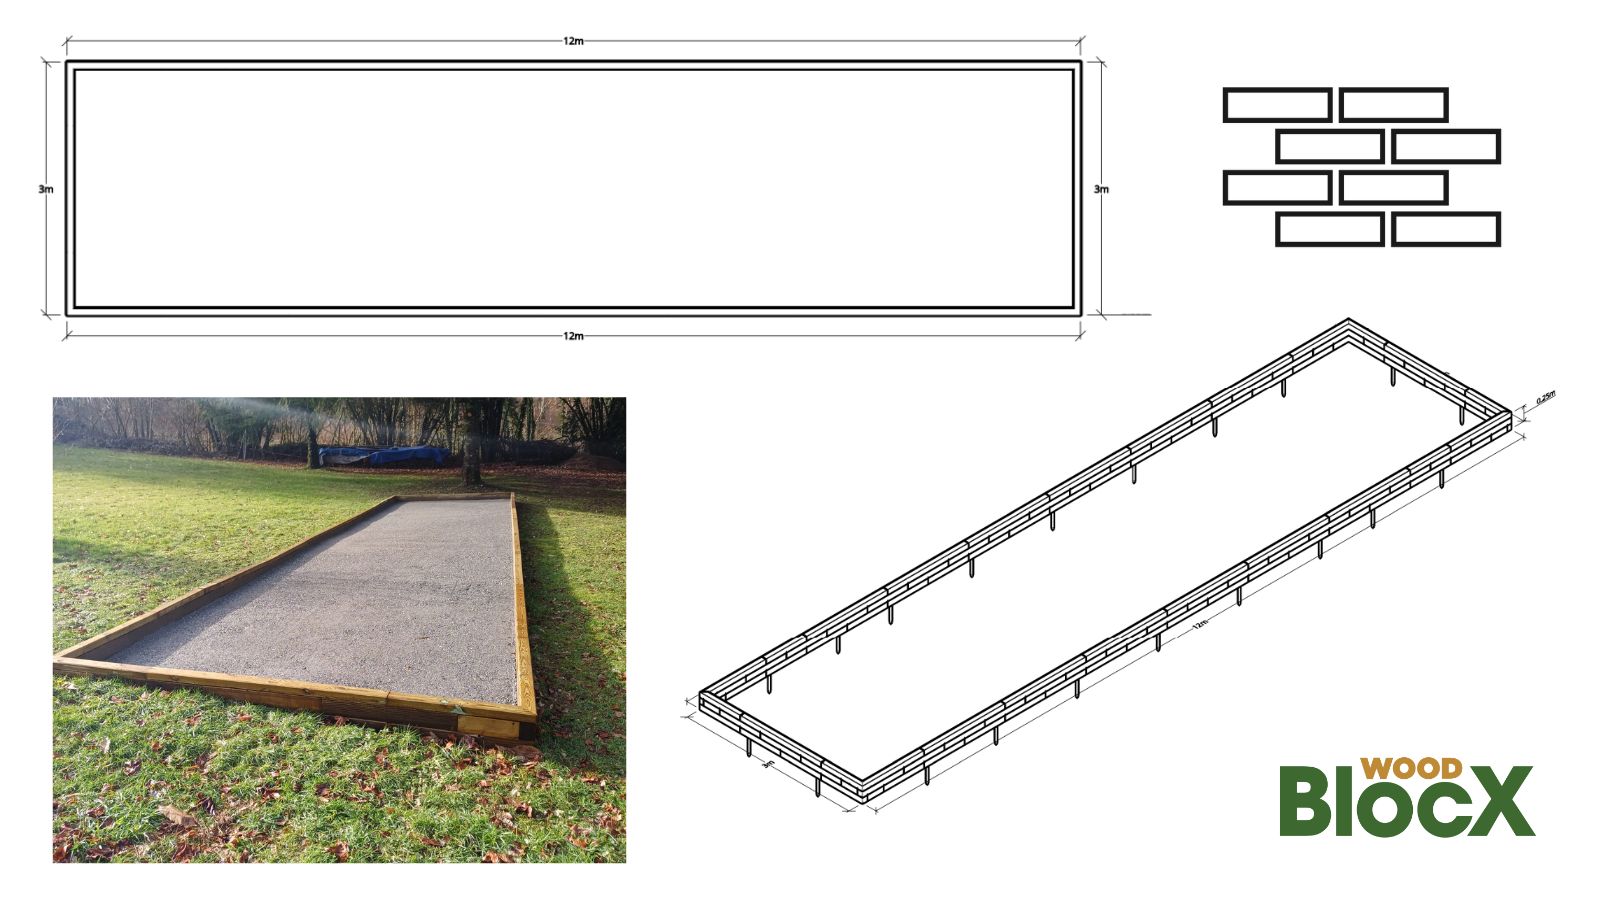
The easiest way to get started is to buy our WoodBlocX pre-designed pétanque court kit – this court’s external dimensions are 12m Length x 3m Width x 0.25m Height. Finished with our modern capping, it’ll be a stylish addition to your garden.
The kit contains the WoodBlocX components required to create the perimeter of the court, with treated timber supplied ready to assemble. Everything arrives at your door, along with layer-by-layer building instructions to guide you through construction.
If you have a particular space or want something different from the standard court dimensions, you can create a bespoke pitch design using our Free Design Service. This is particularly useful if you are working around existing trees, buildings, garden features or awkwardly shaped spaces. The WoodBlocX team can design a pétanque court to suit the space you have available rather than forcing your garden to fit a standard-sized design.
Top tip: Before ordering, measure the available area carefully and think about access to the court. Remember to allow enough room around the playing area for players to comfortably stand, throw and move around.
Step 2: Mark out the court
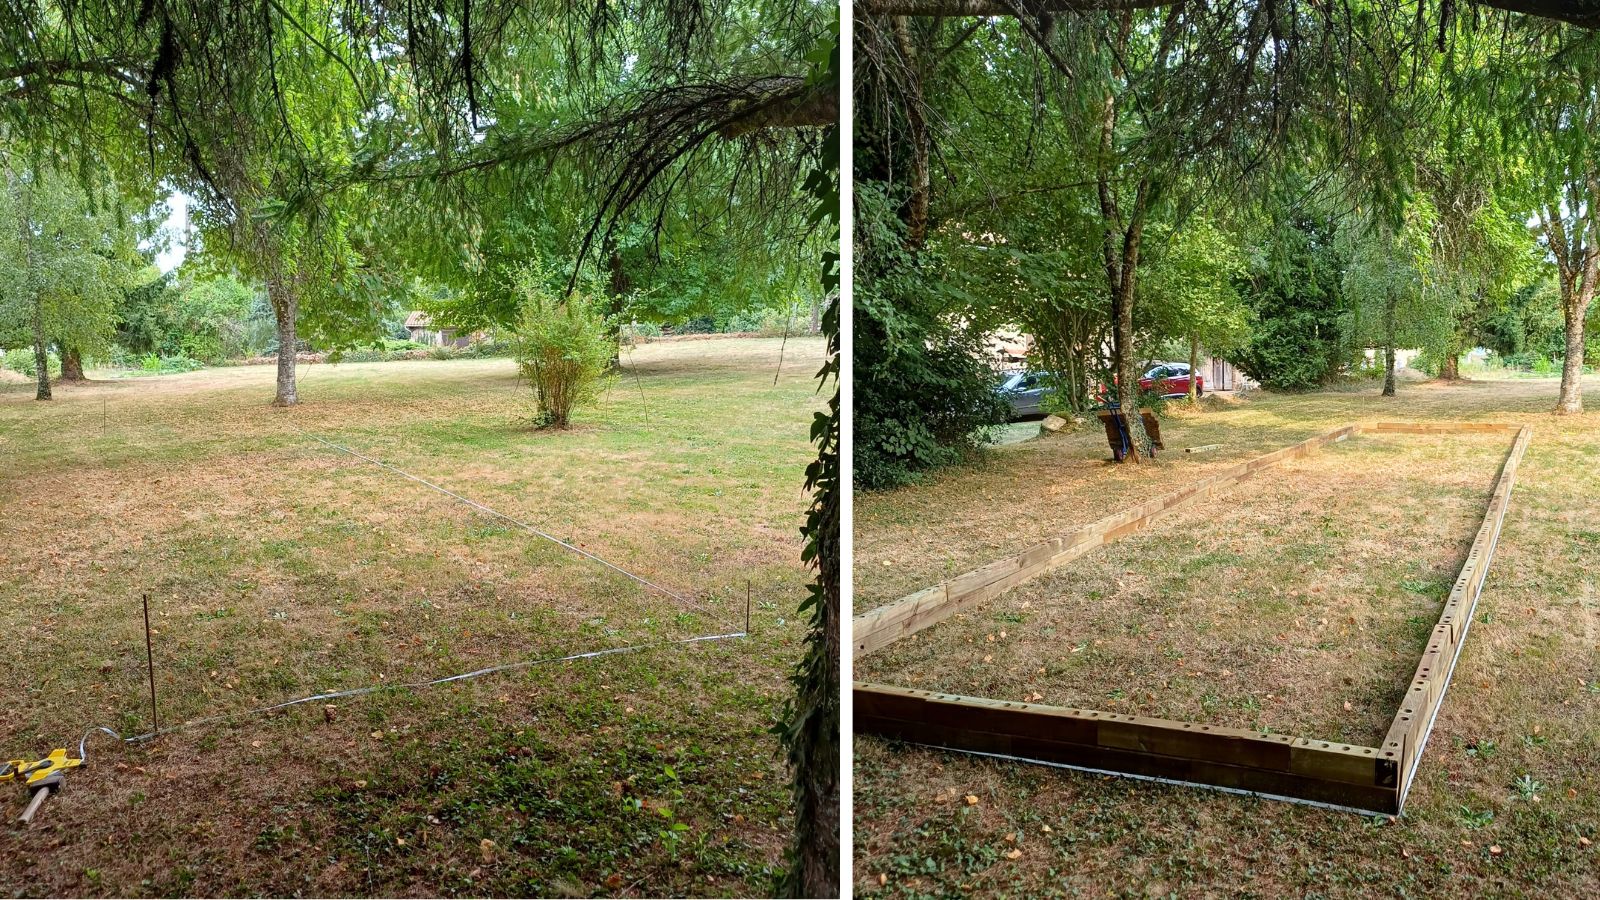
Once your WoodBlocX order arrives, the first job is to mark out exactly where your pétanque court is going to go.
This is an important stage because it gives you the opportunity to see how the court will sit within the garden before you start digging.
Mark the perimeter on the ground and check:
- Whether the proposed area is level or sloped
- Where soil needs to be removed
- Where additional material may be required
- How the court sits in relation to surrounding trees, paths and buildings
- That you have enough space around the court for players
It is also a good idea to lay out all of your WoodBlocX components in approximately the positions shown in your instructions without installing the fixings. This gives you the opportunity to check that you have everything you need before construction begins and makes the installation process much easier once you start building.
Step 3: Build the WoodBlocX perimeter and prepare the drainage base
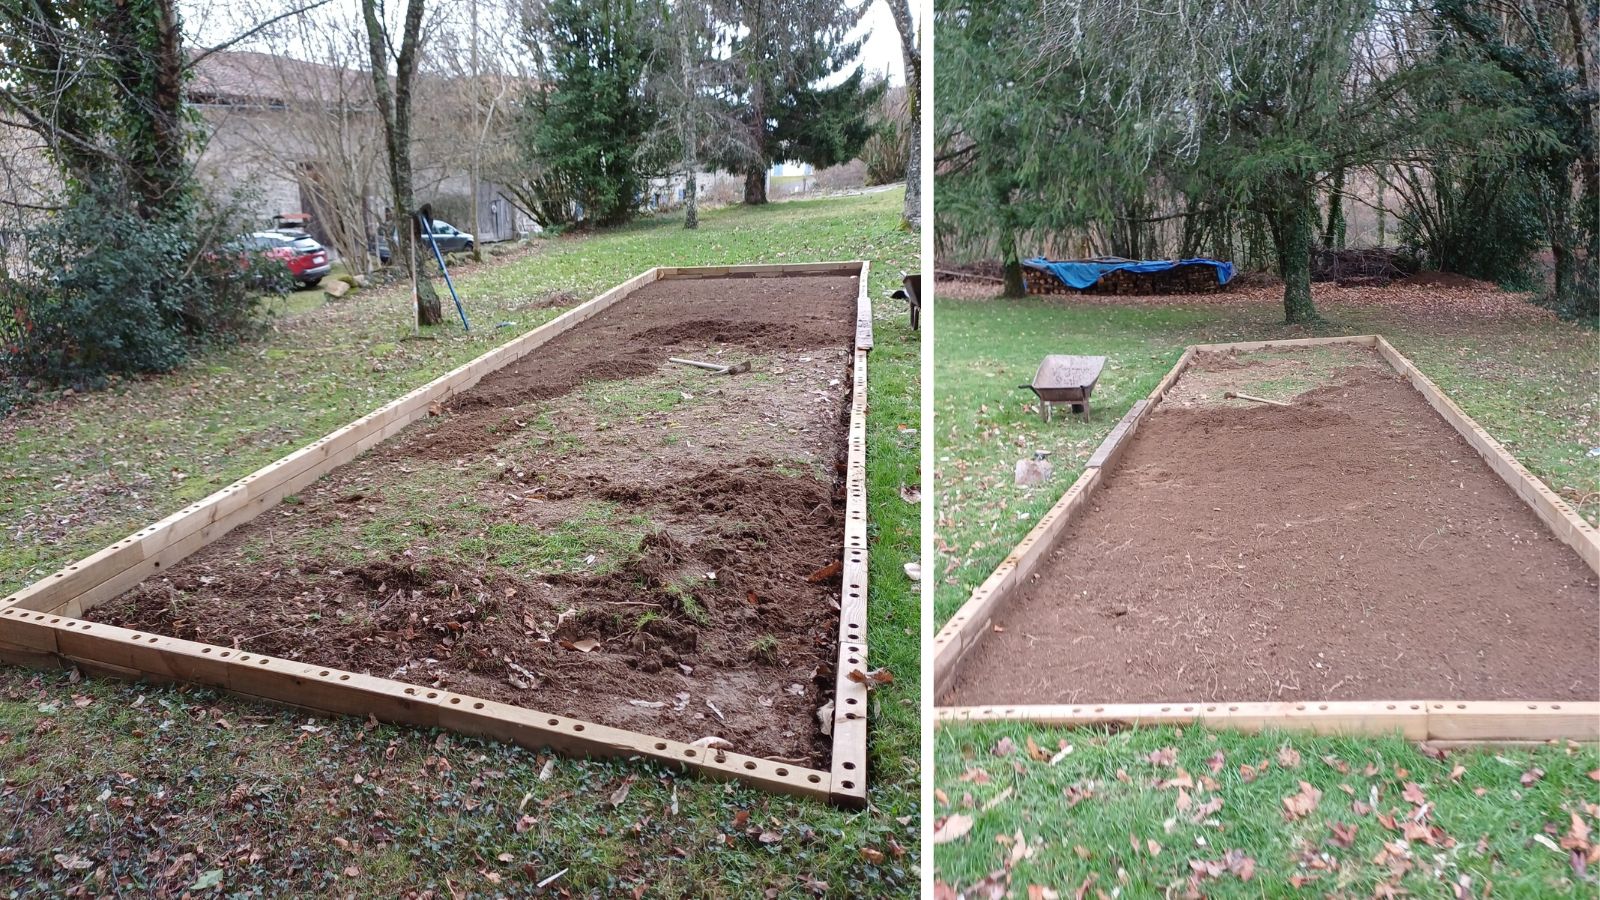
With the court marked out, you can begin preparing the ground. Dig a channel around the perimeter of the court deep enough for the first row of WoodBlocX to sit level on all sides.
Take your time here. Getting the first layer level is important because every subsequent layer of WoodBlocX will build on top of it. Install the first row using the supplied ground spikes and check the level regularly as you work around the court.
Once the first layer is secure, install the second layer using the WoodBlocX dowels. At this stage, don’t install the capping layer – that comes later once the playing surface has been completed. You can now start preparing the internal playing area.
The ground inside the WoodBlocX perimeter needs to be built up with a free-draining base that allows water to pass through the court. An open-consistency drainage material such as MOT Type 2 works well for this purpose.
The exact amount required will depend on your existing ground conditions and how much material needs to be removed to create a level court. Where possible, the earth removed when digging the perimeter channels can be reused elsewhere around the court to help level and infill areas.
Step 4: Install the membrane and sub-base
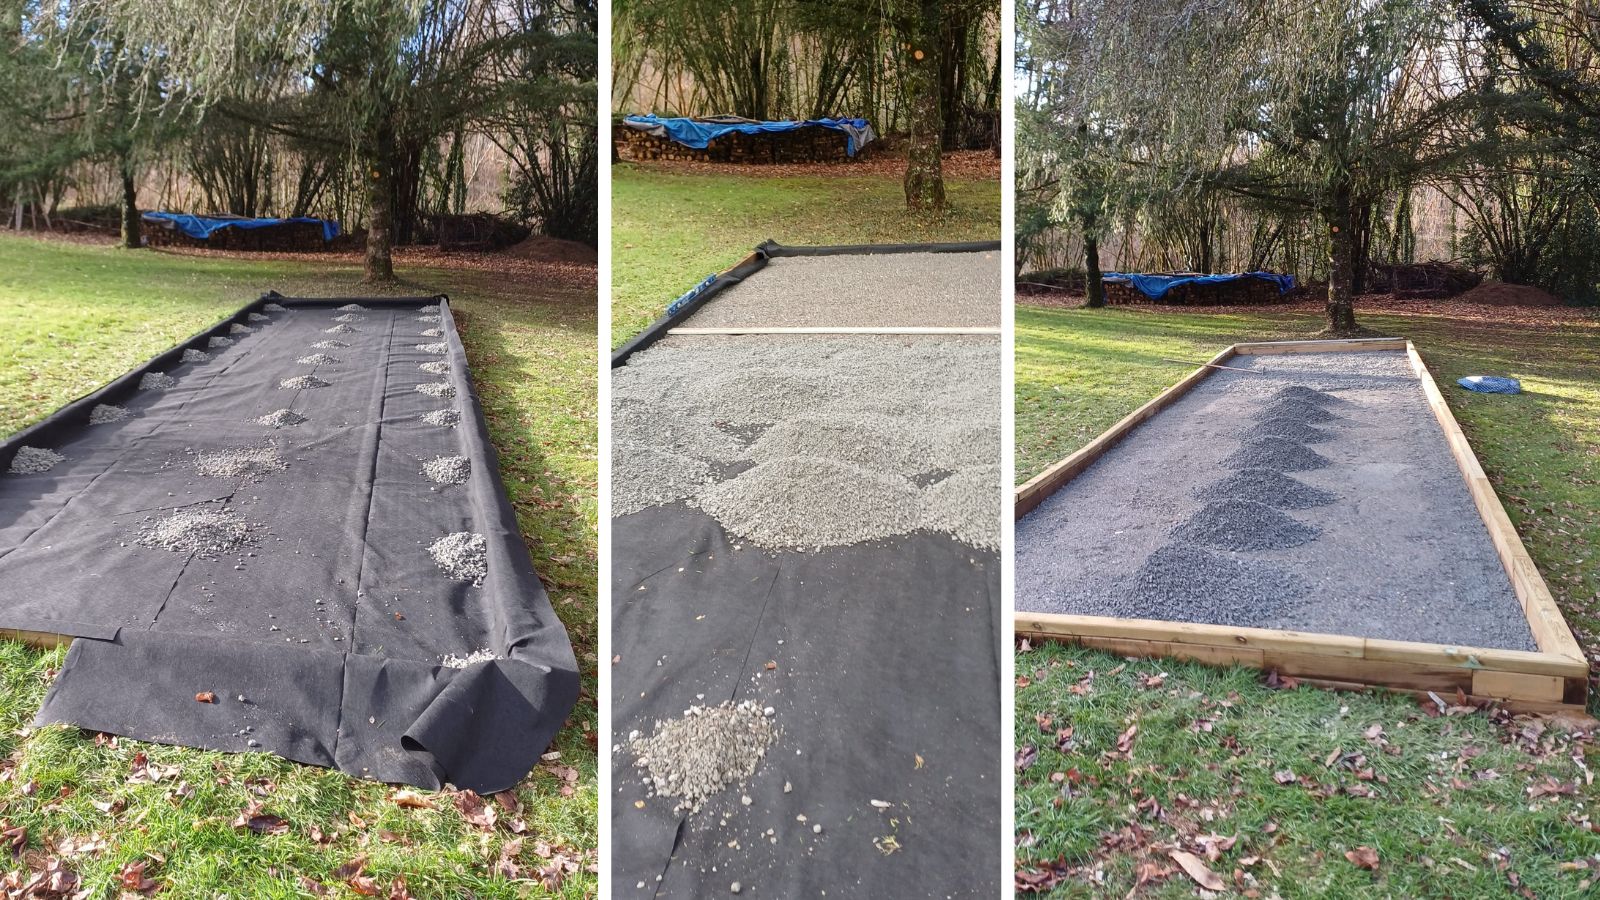
Once your WoodBlocX court perimeter is in place and the internal area has been prepared, it’s time to install the membrane.
Lay a permeable membrane (you will need to source this) across the entire playing area, running it right up to the WoodBlocX perimeter. Make sure you leave plenty of excess membrane around the edges. This will eventually be tucked underneath and trapped by the capping layer.
A useful trick during installation is to use small amounts of gravel to hold the membrane in position. This stops it from moving around while you are getting it into position. Next comes the main sub-base.
Add crushed Carboniferous Limestone to a depth of approximately 50–60mm. Spread the material evenly across the court before lightly compacting it with a whacker plate. Don’t try to achieve the final playing surface at this stage. The aim is to create a solid, stable and well-draining foundation for the layers that follow.
Step 5: Finish the perimeter by hammering down the capping layer
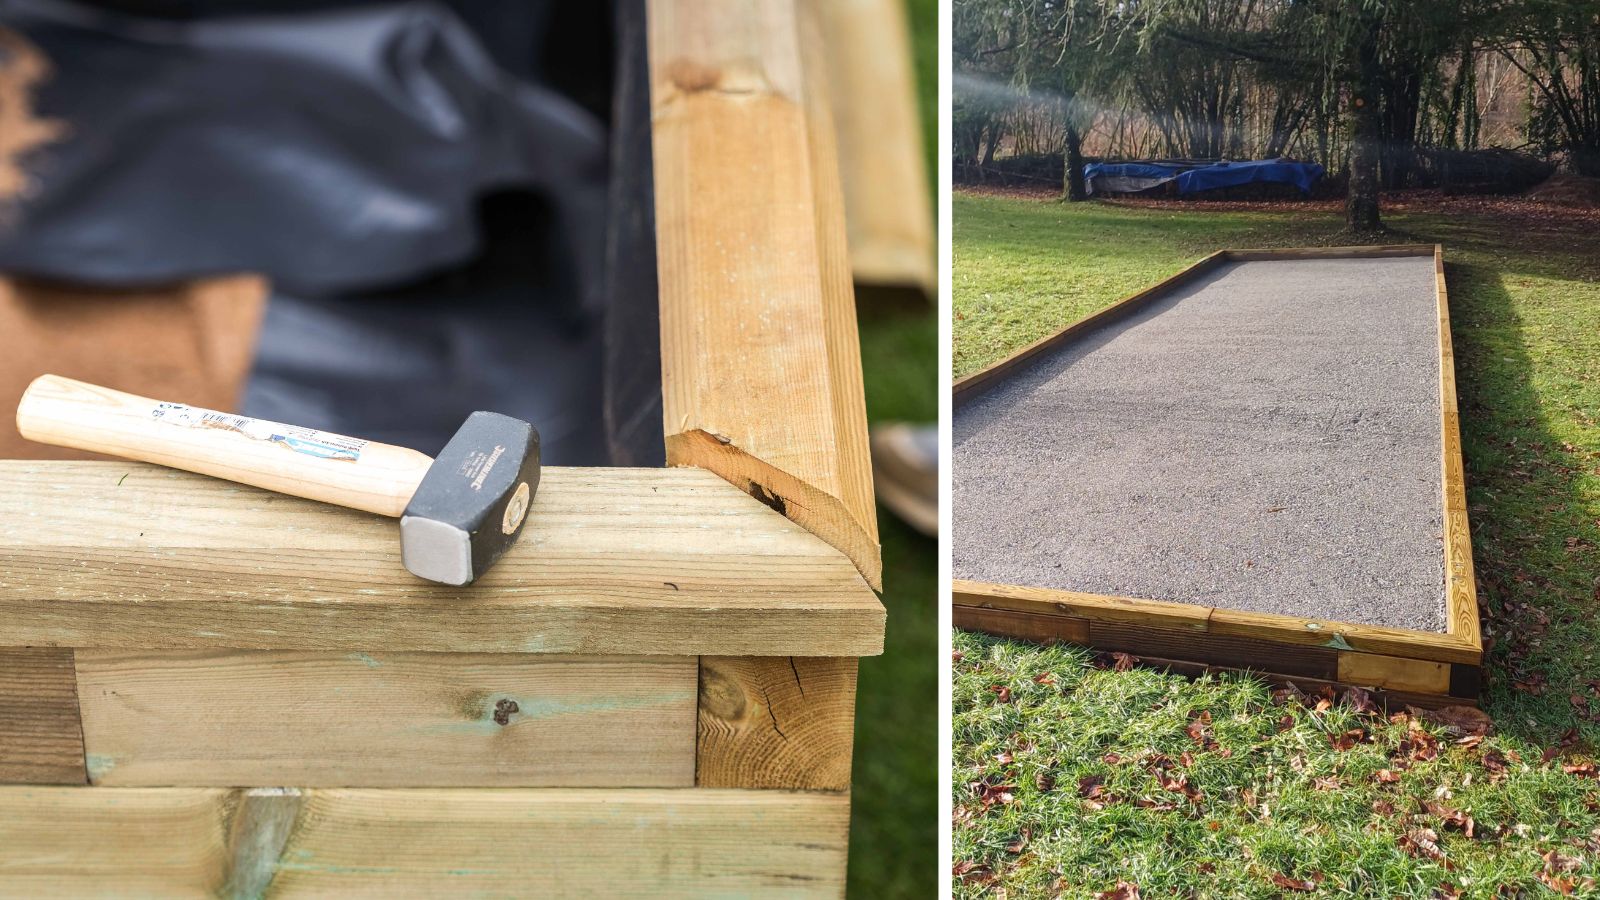
With your sub-base surface complete, it’s time to finish the WoodBlocX construction.
Install the capping layer, following your kit’s layer-by-layer instructions. The capping layer can be hammered down using the supplied final layer dowels, and this is where the excess permeable membrane around the perimeter is trapped underneath the capping.
Once the capping is securely installed, trim the membrane neatly around the outside of the court.
Now it’s time to create the playing surface…
Step 6: Build the playing surface
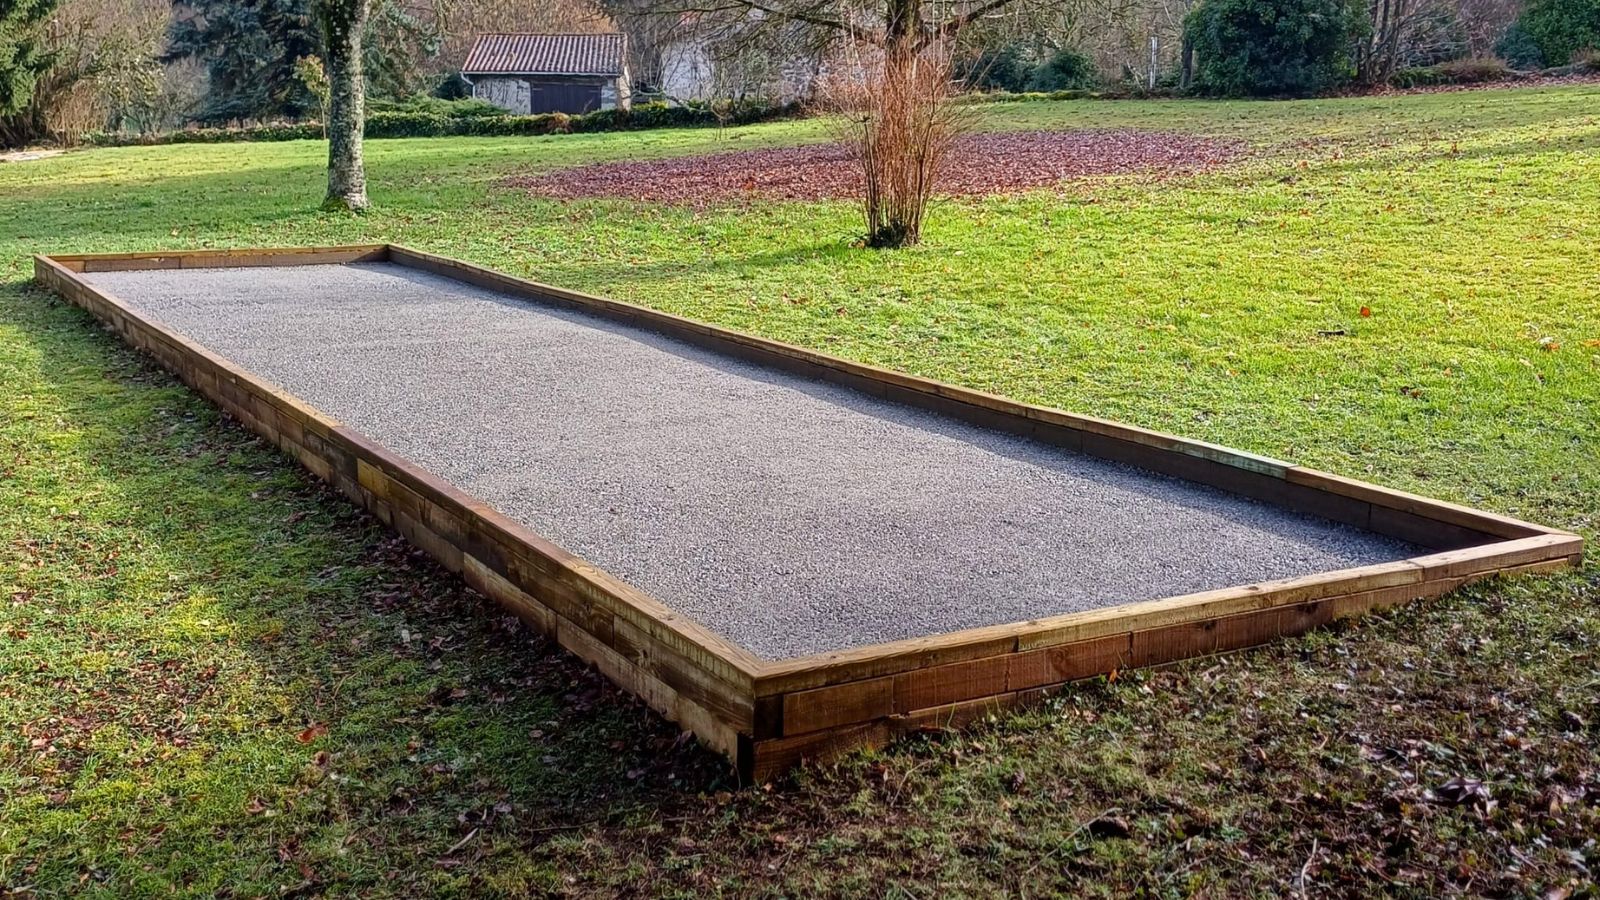
Once the sub-base has been installed, it’s worth giving it a few days to settle. After this period, inspect the court and check whether any areas have sunk or require topping up. This is much easier to correct now than after the final playing surface has been installed.
Once you’re happy with the sub-base, you can move on to the upper layers.
The top base
Install a layer of medium to fine, approximately 10mm sized, crushed Carboniferous Limestone to a depth of around 25mm. Spread this evenly across the court and compact it firmly using a vibrating compactor. This creates a strong, stable layer underneath the final playing surface.
The pétanque playing surface
Finally, add a layer of fine 6mm–0 sized crushed Carboniferous Limestone, using approximately a 60% grit to 40% dust mix. A layer of around 10mm is suitable for creating the final playing surface.
The aim is to create a surface that gives the boules a predictable roll without being excessively fast. Too much dust can create a slow, soft surface, while an overly hard or coarse surface can make the boules run too quickly.
The fine limestone gives you a lovely compromise – a surface that is firm enough for the boules to roll properly but still has enough texture to make the game interesting.
You can lightly dampen the finished playing surface with water to help create subtle, natural undulations. These imperfections add character to the court and make every game slightly different. After all, a perfectly flat court isn’t necessarily the most fun court!
And that’s it – your pétanque court is ready for action.
Step 7: It's time to play pétanque!
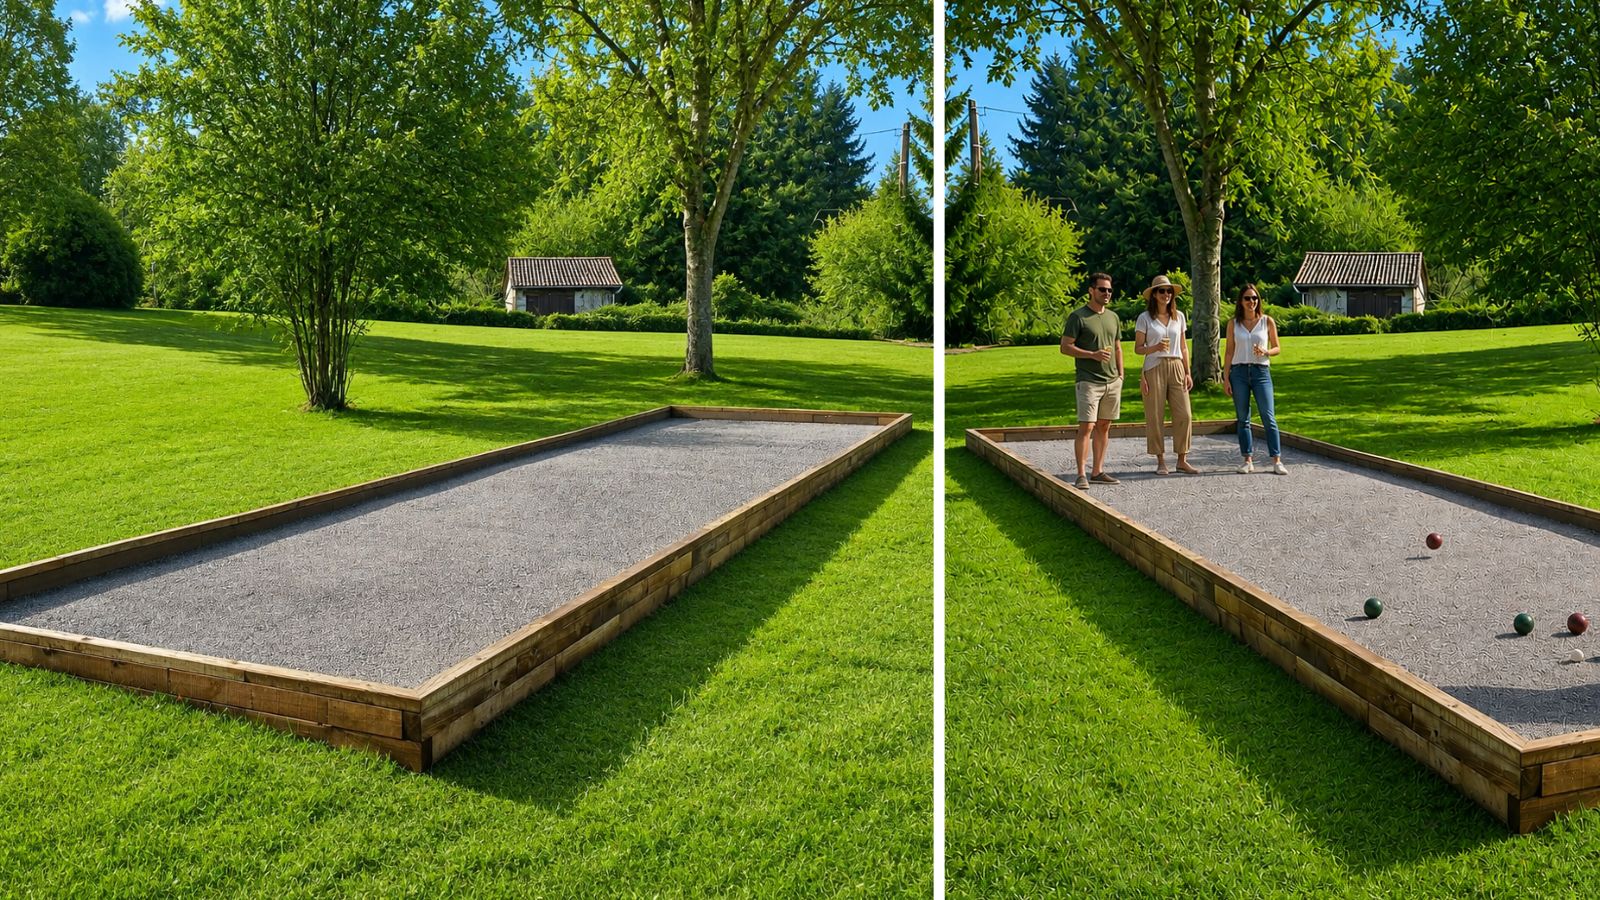
The best thing about building your own pétanque court is what happens after the tools have been put away.
Grab some friends, grab the boules, get the drinks in and settle in for a few games. Pétanque is wonderfully social. You don’t need to be an expert, and games can be as competitive or relaxed as you like. A dedicated court also means you don’t need to spend time setting up a temporary playing area every time you fancy a game.
Over time, your WoodBlocX structure will naturally develop its own character. As the treated timber dries out and is exposed to UV light, it will gradually turn a beautiful golden-brown colour like you see in our marketing photos. There is no need for annual treatment, although the timber can be painted if you want to give your court a particular colour or make it complement the rest of your garden.
Why build a pétanque court with WoodBlocX?
WoodBlocX makes it possible to create a permanent, attractive pétanque court without having to construct a traditional timber frame from scratch.
The modular system is designed to be easy to build, with pre-cut components that slot together using the WoodBlocX dowel system. There is no need for complicated woodworking, specialist cutting equipment or lots of different tools. And because the system is modular, you aren’t restricted to one particular court design.
Whether you’re creating a compact court for a domestic garden, a larger court for a holiday property or something completely bespoke, our Free Design Service can help you create a design to meet your requirements.
A pétanque court is more than just another garden feature. It can provide a reason to get outside, bring friends and family together and make better use of an otherwise unused part of your garden.
With WoodBlocX, the process is straightforward:
Design it → Build the perimeter → Prepare the base → Install the playing surface → Grab your boules → Start playing.
From a standard pre-designed kit to a completely bespoke court, WoodBlocX provides an easy-to-build, long-lasting product backed up by a friendly customer service team.
So, if you’ve always fancied having your own little corner of France at home, why not build a pétanque court and bring the joie de vivre to your garden?
Ready to start your Pétanque project?
Buy our pre-designed Pétanque Court Kit or use the Free Design Service to create a bespoke pétanque court designed specifically for your garden.